
The Lost Cities
Allows the player to play in an old abandoned city instead of the normal overworld
Screenshots
Über diese Mod
The Lost Cities
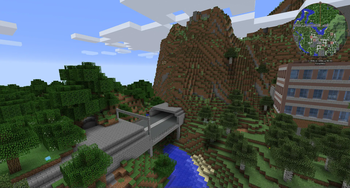
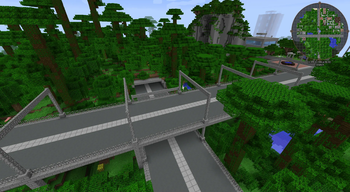
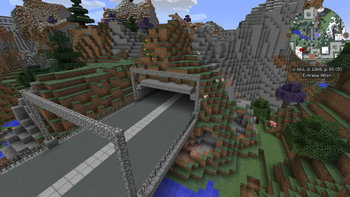
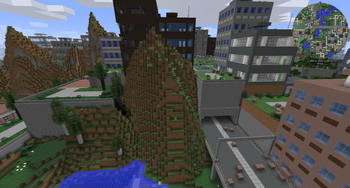
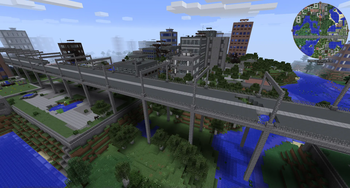
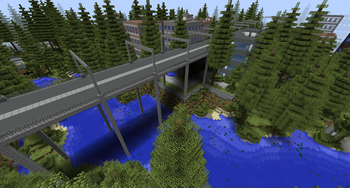
The Lost Cities transforms Minecraft's Overworld into a vast, abandoned civilization. Explore ruined skyscrapers, apartment blocks, factories, roads, highways, bridges, tunnels, subway systems, parks, flooded areas, and underground rooms filled with loot and dangers.
Cities are integrated into the normal terrain, so Lost Cities can be combined with other biome and terrain mods. Depending on the selected profile, the world can contain sprawling city regions, rare cities separated by wilderness, heavily damaged ruins, safer buildings, tall skylines, domed cities, or other specialized landscapes.
Features
- Large procedural cities with streets, buildings, parks, highways, bridges, railways, tunnels, and subways
- Detailed interiors with loot, spawners, cellars, lighting, and extensive damage and decay options
- Multiple built-in profiles for very different world-generation styles
- An in-game configuration screen for selecting a profile and customizing generation
- Support for biome and terrain-generation mods
- Data-driven buildings, palettes, city styles, world styles, and other assets for modpack authors
- Custom profiles for controlling city frequency, building height, damage, explosions, terrain, infrastructure, loot, and much more
- Server-side-only operation, allowing vanilla clients to connect when no client-side Lost Cities features are required
Note: New Street/Highway layout was commissioned by TqLxQuanZ. Thanks for the support!
Current Version Documentation
The documentation stored in the GitHub branch for your Minecraft version is the most accurate and up-to-date source. The Lost Cities Wiki remains useful for older versions and general background, but it may describe legacy behavior that no longer applies.
Minecraft 1.20.1
Minecraft 1.21.1
Minecraft 1.21.11
Minecraft 26.1.2
Setting Up a Server
Choose the profile before generating the world. Changing the profile later affects only newly generated chunks and can create abrupt borders or an inconsistent world. If the server has already generated the intended world, stop it, make a backup, and use a new level-name or remove the old world before continuing.
The profile name is the identifier shown in the Lost Cities profile selector, such as default, nodamage, or another installed profile. Names are case-sensitive. A custom profile must also be installed in the server's Lost Cities profile configuration before the world is created.
Server Setup for 1.20.1
The safest way to configure a 1.20.1 server is to prepare the settings in single player:
- Install the same Minecraft 1.20.1 mod loader, Lost Cities version, and world-generation mods on the client and server.
- On the client, create a new single-player world. Open the Lost Cities configuration from the world-creation screen, enable Lost Cities, select the desired profile, and apply any custom settings.
- Create the world once so Lost Cities writes its world-specific configuration.
- Stop the dedicated server.
- Copy
saves/<your-world>/serverconfig/lostcities-server.tomlfrom the client instance todefaultconfigs/lostcities-server.tomlin the server directory. - Open the copied file and verify that
selectedProfilecontains the desired profile. LeaveselectedCustomJsonas generated if the profile was customized in the UI. - Start the server with a new world. The file in
defaultconfigsis copied into the new world'sserverconfigdirectory and Lost Cities generates the Overworld using that profile.
For an existing server installation that has not generated its world yet, you can instead place a prepared lostcities-server.toml directly in defaultconfigs. Do not use the old level-type=lostcities setting on 1.20.1; Lost Cities is selected through its configuration.
Server Setup for 1.21.1, 1.21.11, and 26.1.2
These versions use the regular server config directory instead of a per-world serverconfig file:
- Install the matching NeoForge and Lost Cities versions on the server, together with any biome, terrain, or asset mods required by the pack.
- Start the server once so the configuration files are created, wait for startup to finish, and then stop it.
- Open
config/lostcities-server.tomlin the server directory. - In the
profilessection, setselectedProfileto the desired profile name. For example:
[profiles]
selectedProfile = "default"
selectedCustomJson = ""
- If you prepared customized settings with the in-game configuration screen, copy the generated
selectedCustomJsonvalue as well; otherwise leave it empty. - The bootstrap run may already have created a normal world. Set a new
level-nameinserver.properties, or back up and remove that generated world, so the next startup creates a completely fresh world. - Start the server. A non-empty
selectedProfileenables Lost Cities generation in the new Overworld; an empty value leaves the normal Overworld unchanged.
For all four current versions, Lost Cities can run only on the server, which permits unmodded clients to connect. Clients still need the mod when they need its configuration GUI or when the modpack contains other content that requires it on both sides.
Legacy Versions
The instructions below are retained for old modpacks. They do not apply to Minecraft 1.20.1 or newer.
Minecraft 1.14 through 1.19.x
Lost Cities is not a separate world type in these versions. In single player, choose the normal world type, open world customization, and use the LC button to enable Lost Cities and select a profile.
For a dedicated server, create and configure a single-player world first. Copy saves/<your-world>/serverconfig/lostcities-server.toml to the server's defaultconfigs directory, then generate a new server world.
Minecraft 1.12.x
Set the following in server.properties before creating the world:
level-type=lostcities
generator-settings={"profile":"nodamage"}
Replace nodamage with the desired profile. When Biomes O' Plenty is installed, use level-type=lostcities_bop for the Biomes O' Plenty variant.
Minecraft 1.12 also provides a separate Lost Cities dimension, using dimension ID 111 by default. This can be disabled for server-side-only use. To travel there, place a bed on two diamond blocks, surround it with six skulls, and try to sleep in it.
For still older releases and historical details, consult the Lost Cities Wiki and the matching branch of the GitHub repository.
Companion Mod
Lost Souls adds more challenge and danger to Lost Cities buildings.
Support
CurseForge comments are disabled because support requests are difficult to track across multiple sites. Please use the Lost Cities issue tracker for bugs and the Lost Cities Discord for discussion.
Modpack policy: Feel free to use Lost Cities in any modpack.
Verfügbare Versionen
The Lost Cities auf dem Server installieren
Server bestellen
Bestelle einen Minecraft Java Server mit mindestens 4 GB RAM (6 GB empfohlen).
fabric Loader setzen
Wähle im Panel unter "Egg" den fabric-Loader und die passende Minecraft-Version (26.2).
Mod installieren
Öffne den Mod-Browser im Dashboard und suche nach "The Lost Cities". Klicke "Installieren" – fertig! Alternativ: Lade die .jar via SFTP in den /mods Ordner.
Kompatibilität
Mod-Loader
Minecraft-Versionen
26.2, 26.1.2, 1.21.11 (+20 weitere)
Server-seitig
✓ ErforderlichEmpfohlener RAM
6 GB(min. 4 GB)Häufige Fragen
The Lost Cities Server crasht beim Start – was tun?
Häufigste Ursache: falsche fabric-Version oder zu wenig RAM. Prüfe im Server-Log (latest.log), ob ein "OutOfMemoryError" oder "Mixin"-Fehler auftritt. Bei Mado Hosting: Stelle sicher, dass mindestens 4 GB RAM zugewiesen sind und der Loader zur Mod-Version passt (26.2). Über das Panel kannst du den Loader mit einem Klick wechseln.
Ist The Lost Cities mit fabric und forge und neoforge kompatibel?
The Lost Cities unterstützt offiziell fabric, forge, neoforge für Minecraft 26.2, 26.1.2, 1.21.11. Achtung: Forge- und Fabric-Mods sind NICHT untereinander kompatibel – wähle einen Loader und bleibe dabei. Im Mado Dashboard werden inkompatible Loader-Kombinationen automatisch erkannt.
Server laggt mit The Lost Cities – wie optimiere ich die Performance?
Empfohlener RAM: 6 GB (+1 GB pro 5 Spieler). Prüfe mit /spark profiler, ob The Lost Cities den meisten Tick-Time verbraucht. Häufige Fixes: Server-View-Distance auf 8-10 reduzieren, bei Forge "performant" oder "starlight" als Zusatz-Mod installieren. Bei Mado Hosting läuft dein Server auf NVMe-SSDs mit dedizierten CPU-Kernen für minimale Latenz.
Ähnliche Mods




Modded Server mieten
Installiere The Lost Cities mit nur einem Klick auf deinem Server.