
Commanders Utilities
Modpack for command users. Included optimizing mods and utilities.
Screenshots

About this Modpack
Commanders Utilities
아래로 스크롤하면 한국어 설명이 있습니다.
A modpack for command, datapack and map developers.
This aims to provide enhanced development environment with fps boosts.
Features
- FPS boost
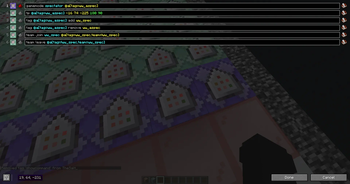
- Multiple command lines in command block
- Fix minecraft's bugs
- Enhanced entity UUID autocomplete
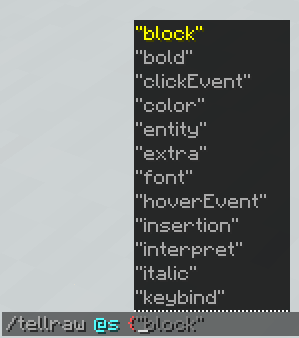
- NBT/JSON autocomplete
- NBT editor
- Multi-version connecting
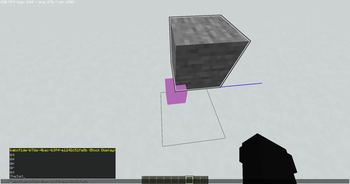
- Enhanced debug features
- Smooth UI
- Carpet mod
and more...
How to Install
Modrinth App
Just click Install button!
MultiMC, Prism Launcher
You need Java 21 to play the game.
- Click Add Instance
- Select Modrinth tab from the left
- Select "Commanders Utilities"
- Click OK
Minecraft Launcher (vanilla)
- Download and install Fabric Loader latest version.
- Open this site and enter
commanders-utilitiesin the input box labeled 'Modrinth Project ID'. - Press the Download button below.
- Extract the zip and put them into
.minecraftfolder. (Overwrite if it already exists) - Launch the installed Fabric profile.
How to Update
Modrinth App
- Select existig instance
- Click
🔄 Update modpackon top right - Click
⇆
Commanders Utilities (KR)
이 모드팩은 커맨드, 데이터팩 및 맵 개발자를 위한 것으로,
최적화 및 더 편한 개발 환경을 제공하는 것을 목표로 합니다.
기능
- FPS 향상 및 기타 최적화
- 커맨드 블록 UI 변경
- 마인크래프트 버그 수정
- 엔티티 UUID 자동완성 강화
- NBT/JSON 자동완성
- NBT 편집기
- 상위 버전에서 하위 버전의 서버 접속
- 디버그 기능 추가
- 부드러운 UI
- Carpet 모드
기타 등등...
설치 방법
Modrinth App
설치 버튼을 클릭하기만 하면 됩니다!
MultiMC, Prism Launcher
게임을 플레이하려면 Java 21이 필요합니다.
- 인스턴스 추가 클릭
- 왼쪽에서 Modrinth 탭 선택
- "Commanders Utilities" 선택
- 확인 클릭
마인크래프트 런처 (바닐라)
- [Fabric Loader](최신 버전)를 다운로드하고 설치합니다.
- 이 사이트를 열고 'Modrinth Project ID'라는 입력란에
commanders-utilities를 입력하세요. - 아래의 다운로드 버튼을 클릭합니다.
- zip 파일을 추출하고
.minecraft폴더에 넣습니다. (이미 존재하는 경우 덮어쓰기) - 설치된 Fabric 프로필을 실행합니다.
업데이트 방법
Modrinth App
- 기존 인스턴스 선택
- 오른쪽 상단의
🔄 모드팩 업데이트클릭 ⇆클릭
Available Versions
How to Set Up a Commanders Utilities Server
Order Server
Choose at least 4 GB RAM (6 GB recommended for Commanders Utilities). Based on player count: per 8 players.
Install Modpack in Dashboard
Open the modpack browser in the dashboard, search for "Commanders Utilities" and click "Install". The fabric loader and Minecraft 1.21.4 are configured automatically.
Start Server & Play
Start the server – all mods are loaded automatically. Share the server IP with friends and play together!
Frequently Asked Questions
Commanders Utilities server crashes or won't start – what to do?
Most common causes: insufficient RAM or wrong fabric loader. Check latest.log for "OutOfMemoryError" → increase RAM to at least 6 GB. For "Mixin" or "ClassNotFoundException" errors: modpack version and loader don't match. With Mado Hosting, loader and Minecraft version are auto-configured on modpack install – preventing most startup issues.
How much RAM does a Commanders Utilities server really need?
Minimum 4 GB, recommended 6 GB for stable performance. per 8 players. Important: Minecraft modpacks need more RAM than vanilla – plan extra per additional player. With Mado Hosting, you can scale RAM up live at any time without data loss (from €8/month).
Can I add custom mods to Commanders Utilities without conflicts?
Yes, but check compatibility: only use mods for the same loader (fabric) and same Minecraft version (1.21.4). Common issues: ID conflicts with recipe mods and incompatible coremod versions. The Mado dashboard mod browser only shows compatible mods and warns about known conflicts.
Commanders Utilities server lagging – performance tips
1) Increase RAM to 6 GB+. 2) Reduce server view-distance to 8 (server.properties). 3) Pre-generate chunks with the "Chunky" plugin. 4) Use /spark profiler to check which mods consume the most tick time. With Mado Hosting, all servers run on NVMe SSDs with dedicated CPU cores – eliminating hardware as a bottleneck.
Similar Modpacks
Rent Commanders Utilities Server
Start your own server with automatic modpack installation.
Supported Versions
Start your Commanders Utilities Server now
From €8.00/month with 6 GB RAM for the best performance.
Configure Server →