
Split Screen Create
A 4 player split-screen multiplayer pack for the Create Mod.
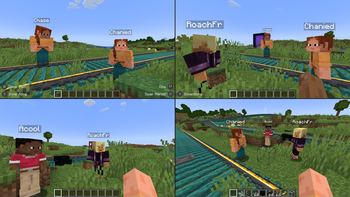
Screenshots
About this Modpack
Overview
This modpack is designed for easy split-screen multiplayer. It focuses on the Create mod and its add-ons. This pack also includes various structure mods to encourage exploration.
The pack is playable with up to 4 players using controllers on a single (preferably large) screen. Optionally, one player can use the keyboard/mouse. For controller players, the mouse/keyboard can be swapped to focus on another window if a mod requires them.
Performance
Because of the way Minecraft handles running the server (Host World) and client (Other Players), this pack runs much faster (TPS/CPU) than 4 separate instances. It does, however, still take additional power from the GPU (FPS) to render 4 clients. Because of this, it is recommended to lower the resolution of the game since each window is reduced to a quarter of the original size.
How to use
Playing Together
Use the PrisimMC (or MultiMC) launcher to import this pack from Modrinth. PrisimMC allows you to create separate instances (or multiple running copies) of Minecraft. You will need to download this pack for each instance that will be running.
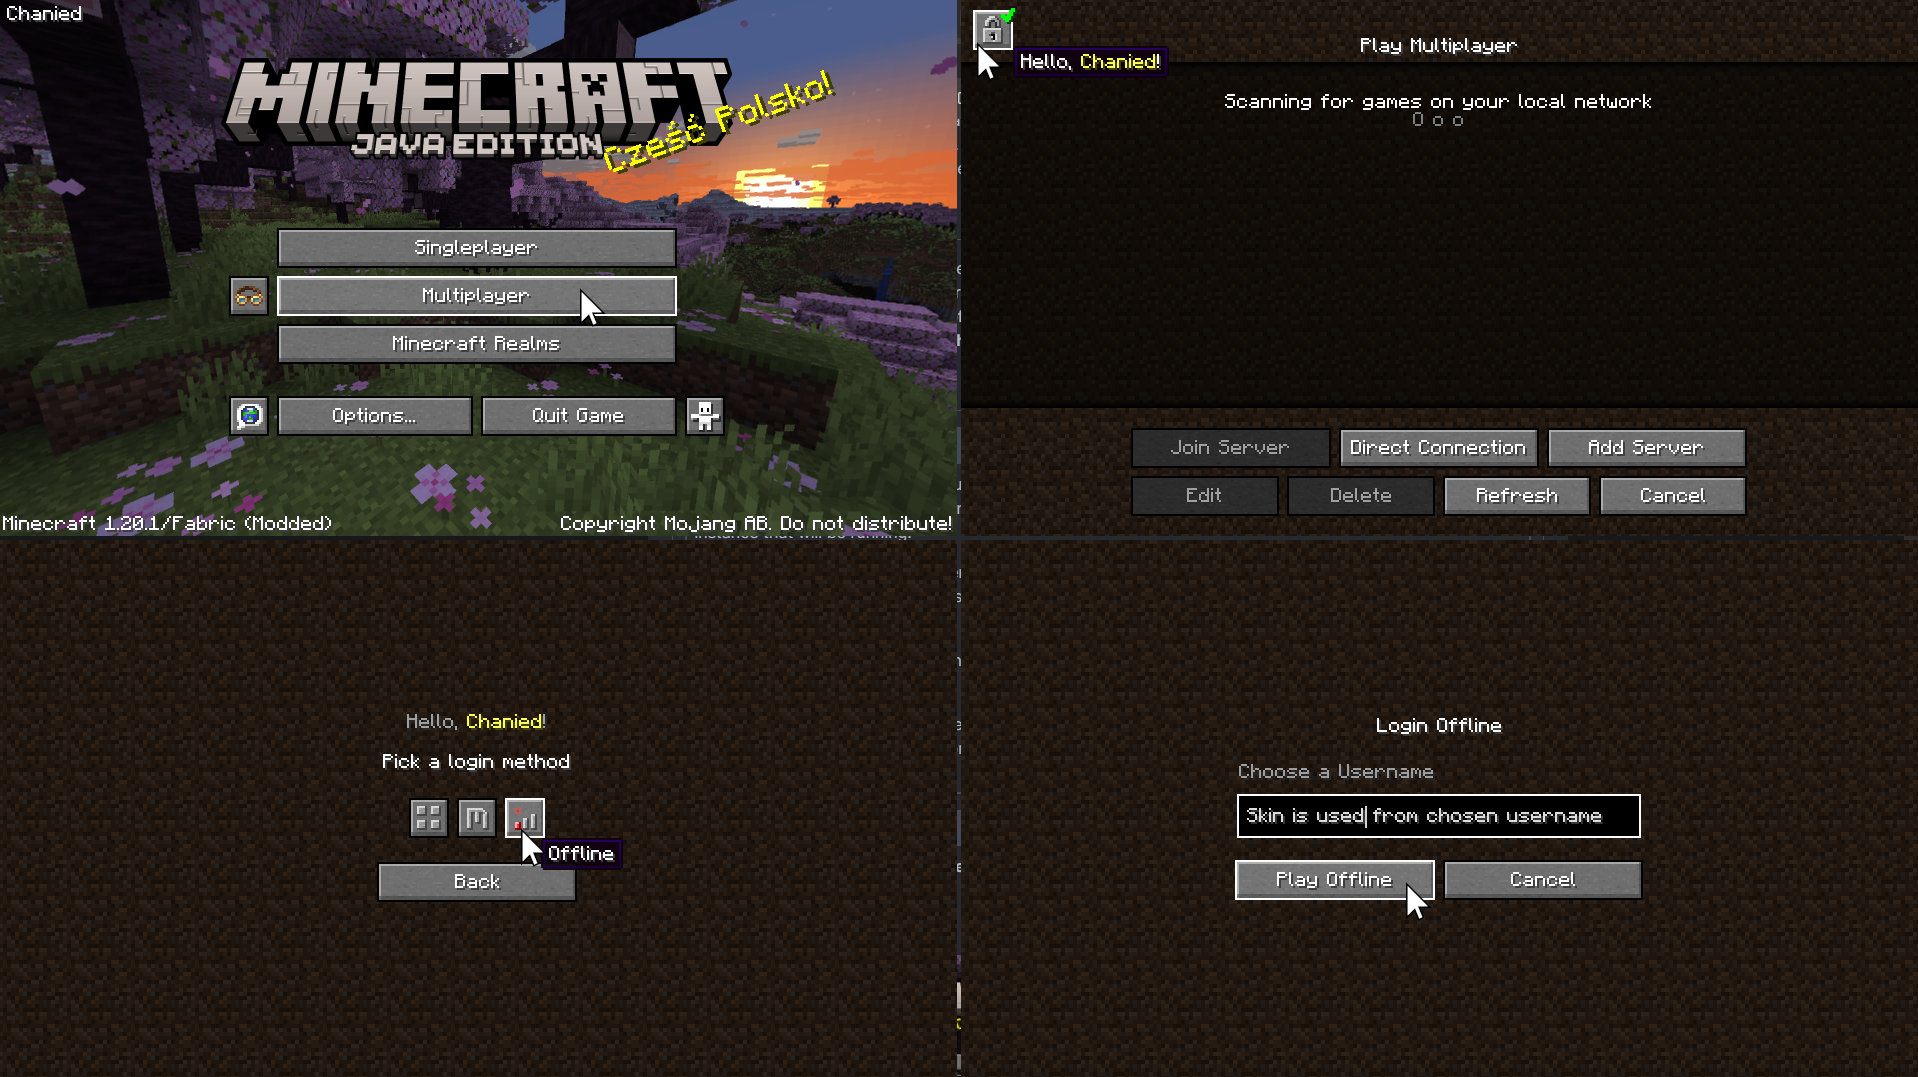
To play on an external server, either the server must disable online mode or each player must use a different Minecraft account. You can also install the E4MC mod, which makes LAN worlds joinable by anyone like a server.
For local play, host a LAN server on the main instance of the pack. All of the other instances will need to join that local server.
If you only have one account to use, you will need to use the AuthMe mod to enable Offline Mode for both online and local multiplayer. Click on the lock icon in the Multiplayer menu to enter Offline mode. If you enter the name of a Minecraft Account, their skin will be used.
Using Splitscreen
To put the windows into Split Screen, press F11. This cycles between different positions and sizes for each instance.
You may need to hide the taskbar to see the bottom of the screen.
To prevent the escape menu from automatically appearing, press F3+P to disable
pauseOnLostFocus.
options.txt
Instead of using the shortcut, you can run each instance once to generate the **options.txt** file. Open the modpack folder and edit **options.txt**. Change the value of **pauseOnLostFocus** from **true** to **false**.
Assigning Controls
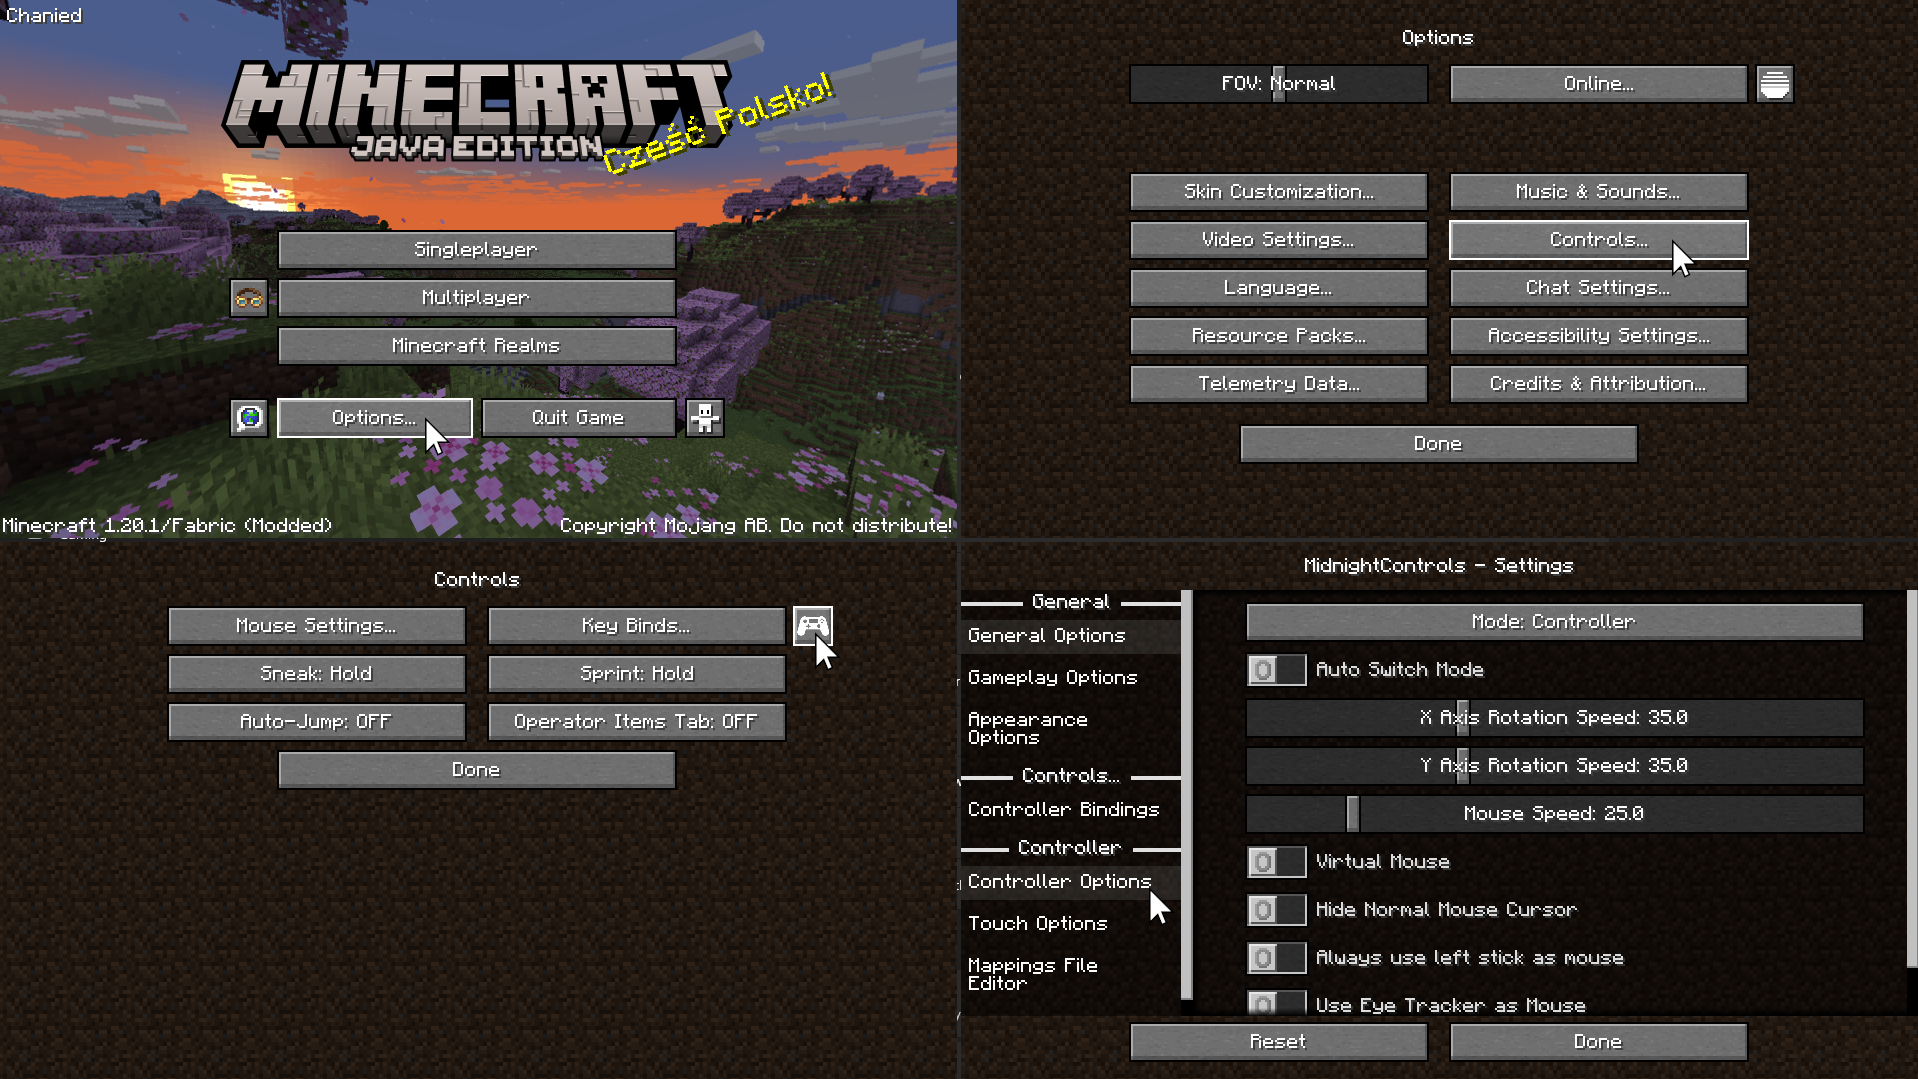
On the Minecraft menu, click Options -> Controls -> and the Controller Icon to enter the Midnight Controls menu.
If that instance will be using a keyboard/mouse, turn off Auto Switch Mode.
If that instance will be using a controller, turn on Virtual Mouse. Then, open Controller Options on the sidebar to enable unfocused input.
If you only plan on playing with 1 controller, you can skip this step. We need to assign a controller to each instance of Minecraft. Switch the selected controller at the top of Controller Options to the controller for that instance.
Advanced Controller Options
For more controller options (such as mappings), you will need to download GamepadTool. Copy your mapping code and paste it into the Mappings File Editor inside Moonlight Controls
Other Guides
GamepadTool
Midnight Controls Settings
options.txt
1 controller only
Available Versions
How to Set Up a Split Screen Create Server
Order Server
Choose at least 6 GB RAM (8 GB recommended for Split Screen Create). Based on player count: per 5 players.
Install Modpack in Dashboard
Open the modpack browser in the dashboard, search for "Split Screen Create" and click "Install". The fabric loader and Minecraft 1.20.1 are configured automatically.
Start Server & Play
Start the server – all mods are loaded automatically. Share the server IP with friends and play together!
Frequently Asked Questions
Split Screen Create server crashes or won't start – what to do?
Most common causes: insufficient RAM or wrong fabric loader. Check latest.log for "OutOfMemoryError" → increase RAM to at least 8 GB. For "Mixin" or "ClassNotFoundException" errors: modpack version and loader don't match. With Mado Hosting, loader and Minecraft version are auto-configured on modpack install – preventing most startup issues.
How much RAM does a Split Screen Create server really need?
Minimum 6 GB, recommended 8 GB for stable performance. per 5 players. Important: Minecraft modpacks need more RAM than vanilla – plan extra per additional player. With Mado Hosting, you can scale RAM up live at any time without data loss (from €12/month).
Can I add custom mods to Split Screen Create without conflicts?
Yes, but check compatibility: only use mods for the same loader (fabric) and same Minecraft version (1.20.1). Common issues: ID conflicts with recipe mods and incompatible coremod versions. The Mado dashboard mod browser only shows compatible mods and warns about known conflicts.
Split Screen Create server lagging – performance tips
1) Increase RAM to 8 GB+. 2) Reduce server view-distance to 8 (server.properties). 3) Pre-generate chunks with the "Chunky" plugin. 4) Use /spark profiler to check which mods consume the most tick time. With Mado Hosting, all servers run on NVMe SSDs with dedicated CPU cores – eliminating hardware as a bottleneck.
Similar Modpacks
Rent Split Screen Create Server
Start your own server with automatic modpack installation.
Supported Versions
Start your Split Screen Create Server now
From €12.00/month with 8 GB RAM for the best performance.
Configure Server →