
PxL Updater
This mod links mods from your Git repository to the client.
Screenshots
About this Mod
What does the Mod do?
This mod is designed for the automatic updating of "Client" ModPacks. These ModPacks are automatically updated whenever the "Server" ModPack is updated.
How does it work?
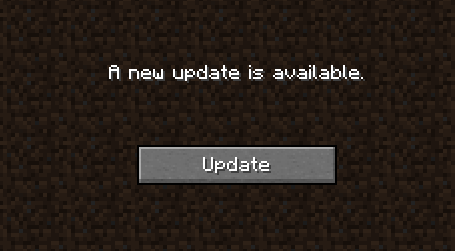
When the client is launched, if it detects an update, a window will pop up, notifying the player that the modpack has an update. There will also be a Update button, which will trigger the modpack update and then close Minecraft.
Server ModPack
This ModPack is actually a GitHub repository that contains a file with the server ModPack version and a folder with the mods.
How to set up the Server ModPack
- Create a GitHub repository. (Public)
- Inside the repository, create a file called
version.json. - In the version.json file, write the following:
{
    "version": "1.0.0"
}
(This version represents the server modpack version. You’ll need to increase this version whenever you add updates.)
Upload the mods in a compressed file named mods.zip (The mods should be directly in the main directory of the compressed file, meaning there should be no folders inside the compressed file.)
Client ModPack
This ModPack is for the player using these mods. It will include a pxl-updater.json file, where the current client version and the GitHub repository link will appear.
How to set up the Client Mod
- Install the mod and launch Minecraft with it for the first time.
- In your launcher, you’ll find a
configfolder, and inside it, you’ll see a file calledpxl-updater.json. - Edit this file to update the
repositoryUrlvalue. Theversionwill automatically sync to the one in the GitHub repository.
Available Versions
How to Install PxL Updater on Your Server
Order Server
Order a Minecraft Java server with at least 3 GB RAM (4 GB recommended).
Set forge Loader
In the panel under "Egg", select the forge loader and matching Minecraft version (1.16.5).
Install Mod
Open the mod browser in the dashboard and search for "PxL Updater". Click "Install" – done! Alternatively, upload the .jar via SFTP to the /mods folder.
Compatibility
Mod Loaders
Minecraft Versions
1.16.5
Server-side
✗ UnsupportedRecommended RAM
4 GB(min. 3 GB)Frequently Asked Questions
PxL Updater server crashes on startup – what to do?
Most common cause: wrong forge version or insufficient RAM. Check the server log (latest.log) for "OutOfMemoryError" or "Mixin" errors. With Mado Hosting: ensure at least 3 GB RAM is allocated and the loader matches the mod version (1.16.5). You can switch loaders with one click in the panel.
Is PxL Updater compatible with forge?
PxL Updater officially supports forge for Minecraft 1.16.5. The Mado dashboard automatically detects incompatible loader combinations.
Server lagging with PxL Updater – how to optimize performance?
Recommended RAM: 4 GB (per 8 players). Use /spark profiler to check if PxL Updater consumes the most tick time. Common fixes: reduce server view-distance to 8-10, install "performant" or "starlight" as supplementary mods on Forge. With Mado Hosting, your server runs on NVMe SSDs with dedicated CPU cores for minimal latency.
Similar Mods
Rent Modded Server
Install PxL Updater with just one click on your server.