
Modrinth · Fabric, Forge, NeoForge, Quilt
Axis World Editor auf deinem Minecraft Server
Axis World Editor läuft auf Minecraft Servern mit Fabric oder Forge oder NeoForge oder Quilt. Bestell deinen Server, stell den Loader im Panel ein und installiere die Mod mit einem Klick im Mod-Browser.
Vanilla WorldEdit: 1 Tool, ∞ Features.
- Downloads
- 78.0K
- Autor
- G4bc
- Loader
- Fabric, Forge, NeoForge, Quilt
- Minecraft
- 1.21.10 – 26.3
- Aktualisiert
- –
Screenshots
So sieht Axis World Editor aus
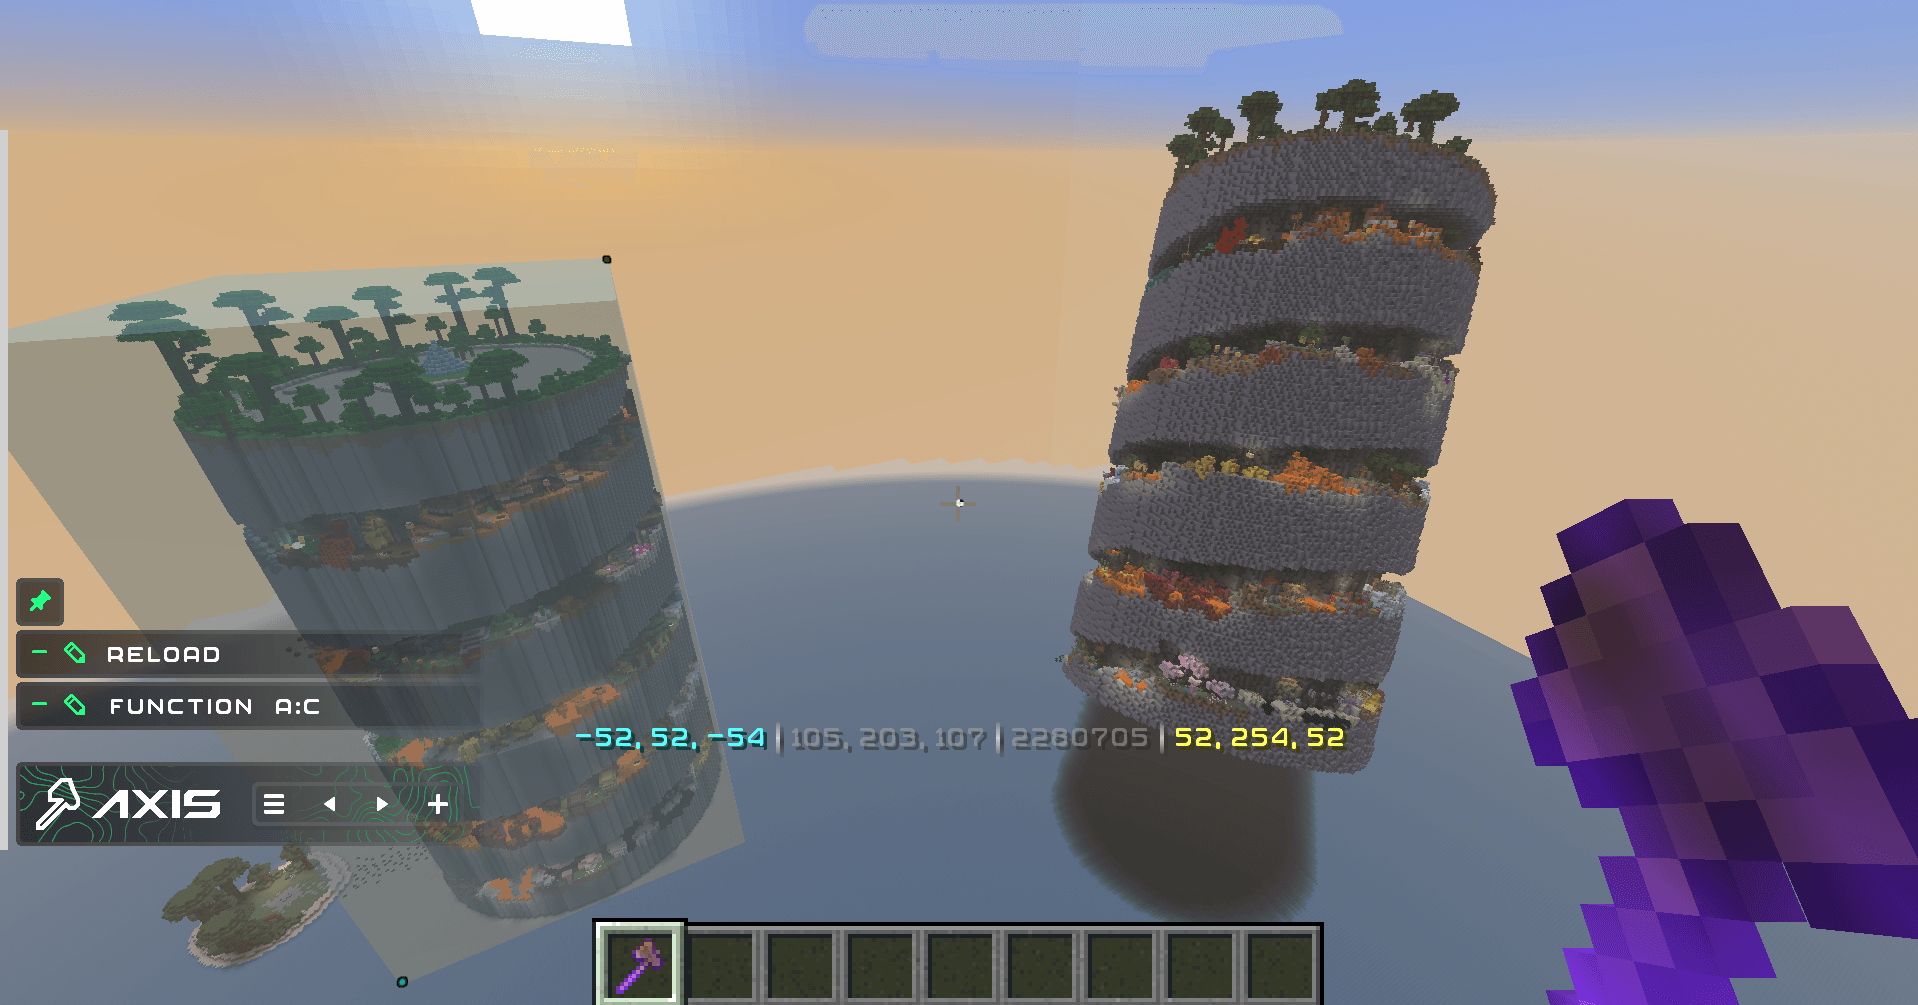
 Free-Rotate
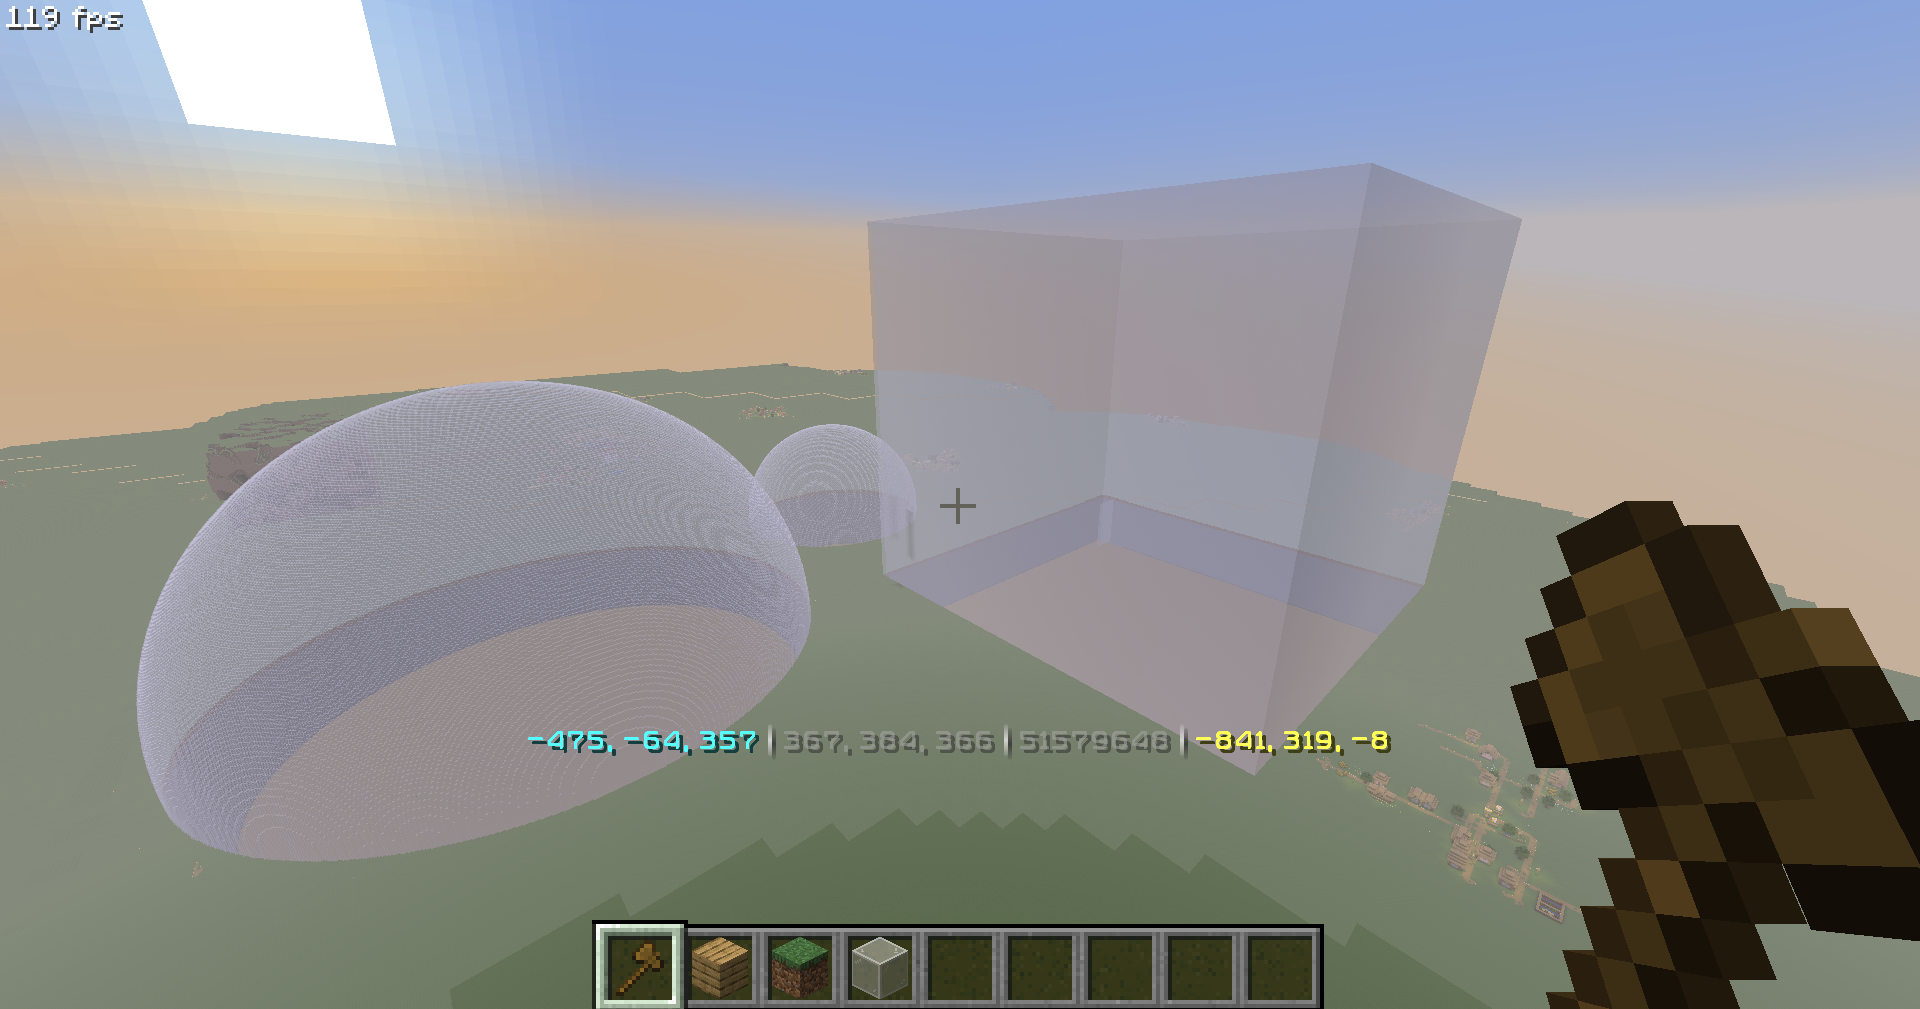 50+ Million blocks successfully replaced in one go
 Multi-Material block operations
 Multi-Hotbar
 In-game Wiki
Bilder: Axis World Editor auf Modrinth, vom Projektteam veröffentlicht.
Einrichtung
Axis World Editor auf dem Server installieren
Server und Spieler brauchen denselben Loader und dieselbe Minecraft-Version. Sichere die Welt, bevor du Mods hinzufügst oder aktualisierst.
- 01
Konfigurieren
4 GB RAM sind vorausgewählt. Laufzeit und Add-ons wählst du selbst, bezahlt wird per Kreditkarte oder PayPal.
- 02
Loader einstellen
Stell im Panel die Serversoftware auf Fabric oder Forge oder NeoForge oder Quilt und wähl die passende Minecraft-Version, zum Beispiel 26.4-snapshot-9.
- 03
Mod installieren
Such im Mod-Browser nach „Axis World Editor“ und installiere die Version für deinen Loader. Alternativ lädst du die .jar per SFTP in den Ordner mods. Erforderliche Abhängigkeiten stehen auf der Projektseite.
- 04
Verbinden
Axis World Editor ist auf dem Client optional. Spieler verbinden sich über die Serveradresse aus dem Panel.
- Auf dem Server
- Erforderlich
- Auf dem Client
- Optional
- Loader
- Fabric, Forge, NeoForge, Quilt
- Minecraft
- 26.4-snapshot-9, 26.4-snapshot-8, 26.4-snapshot-7 +42 weitere
- Lizenz
- LicenseRef-PolyForm-Shield-License-1.0.0
Das Panel
Mods installieren, Fehler finden.
Echte Screenshots aus dem Mado Panel. Beides ist bei jedem Minecraft Server enthalten.
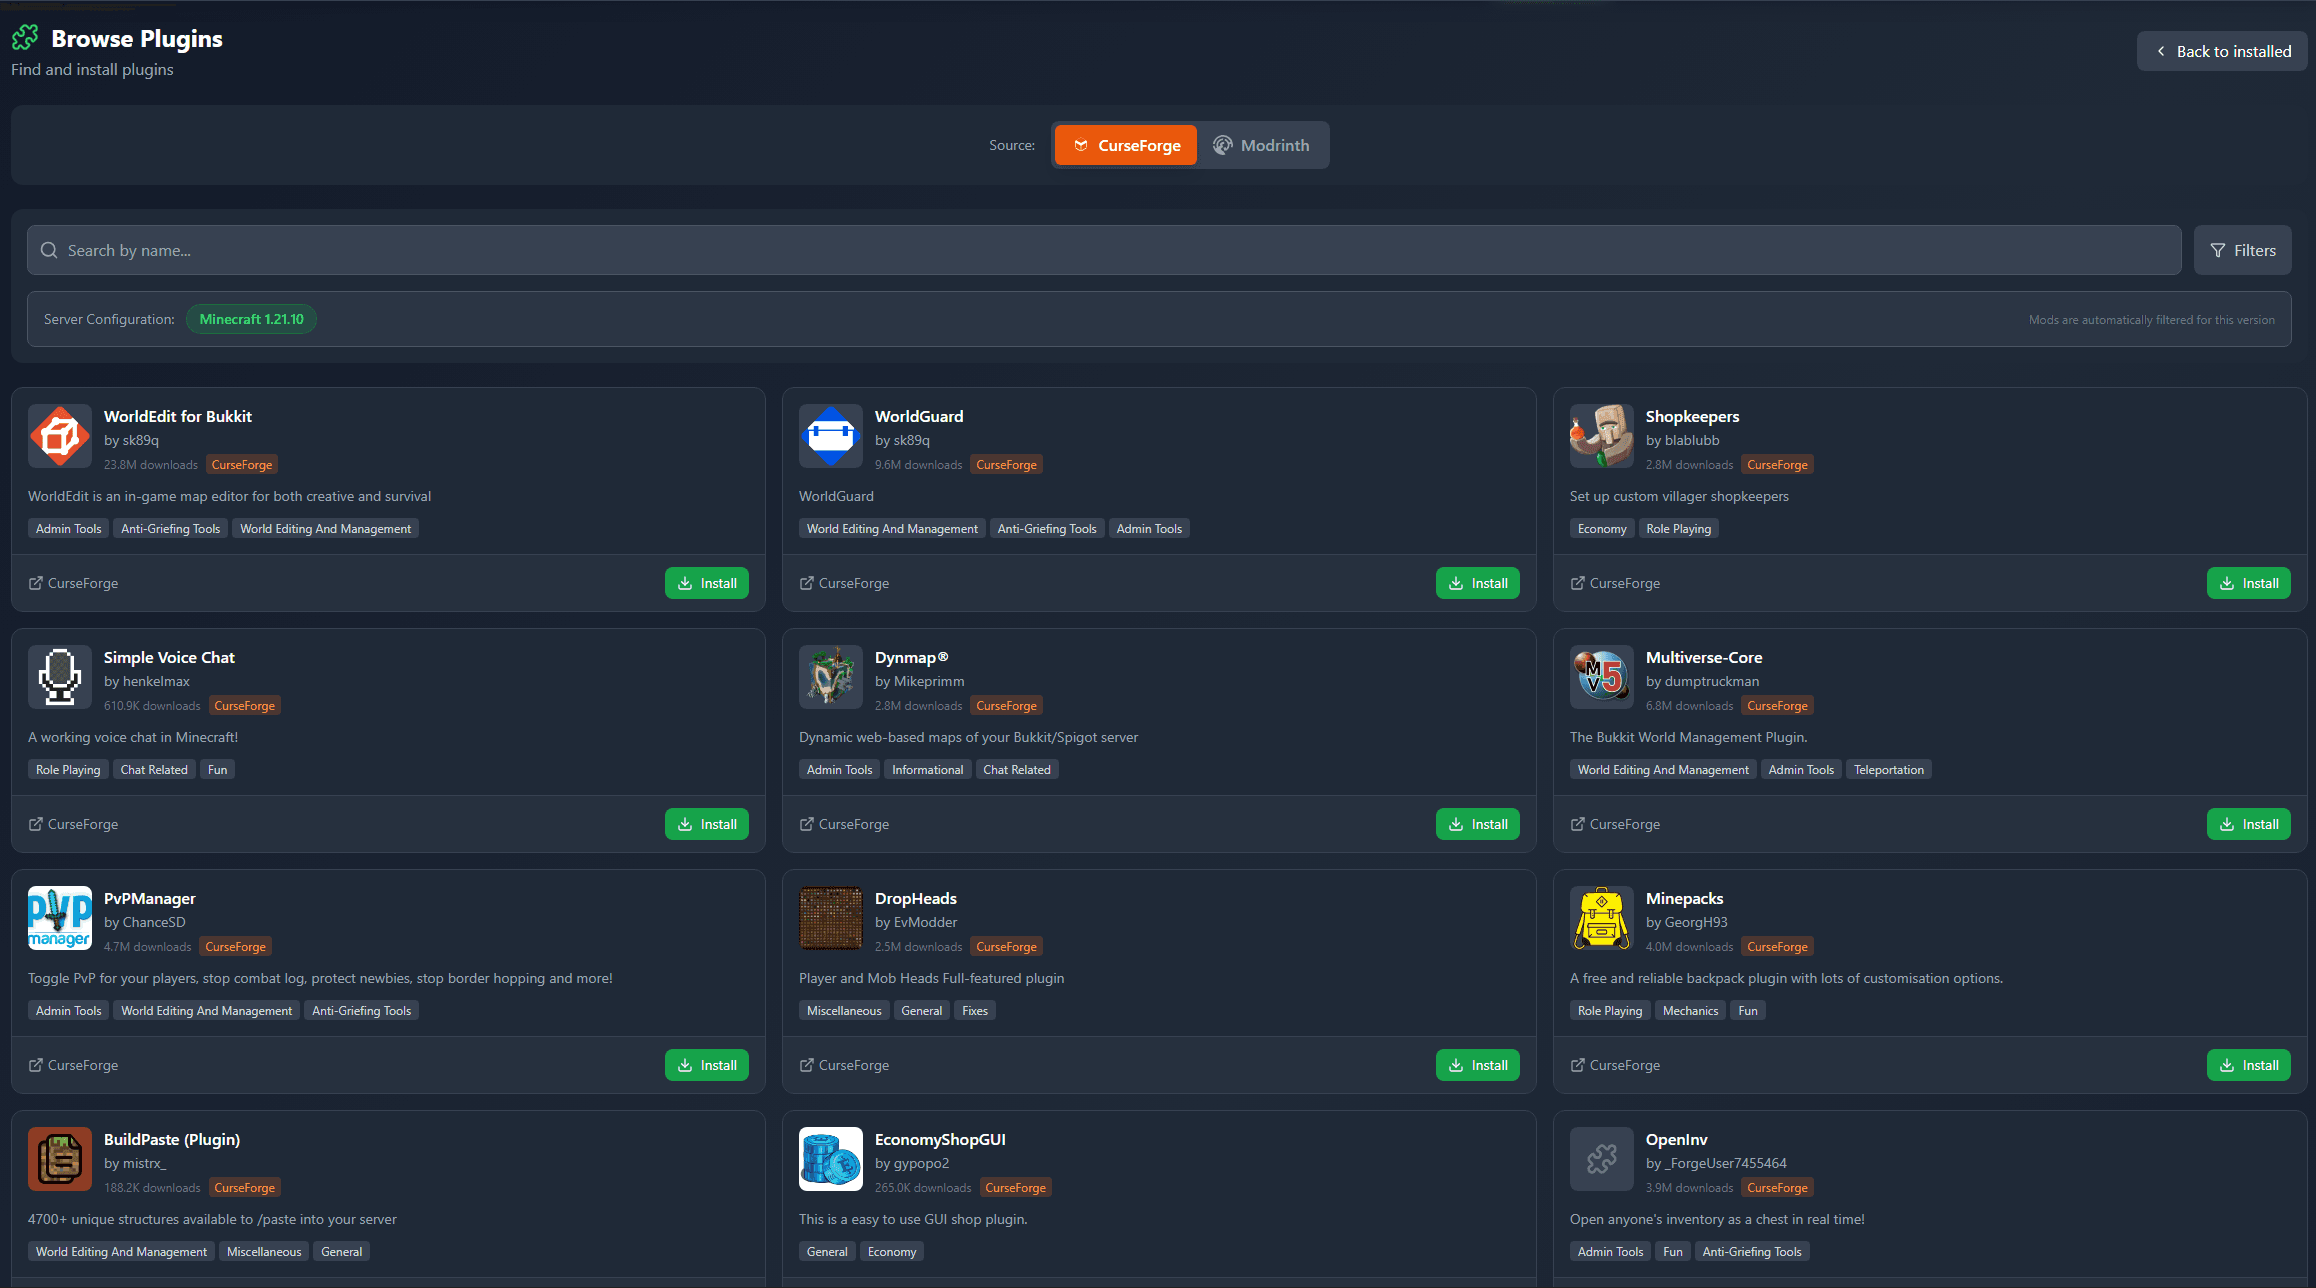
Mod-Browser
Modrinth und CurseForge direkt im Panel.
Der Browser filtert nach deiner Minecraft-Version. Mods installierst du mit einem Klick, ohne .jar-Dateien hochzuladen.
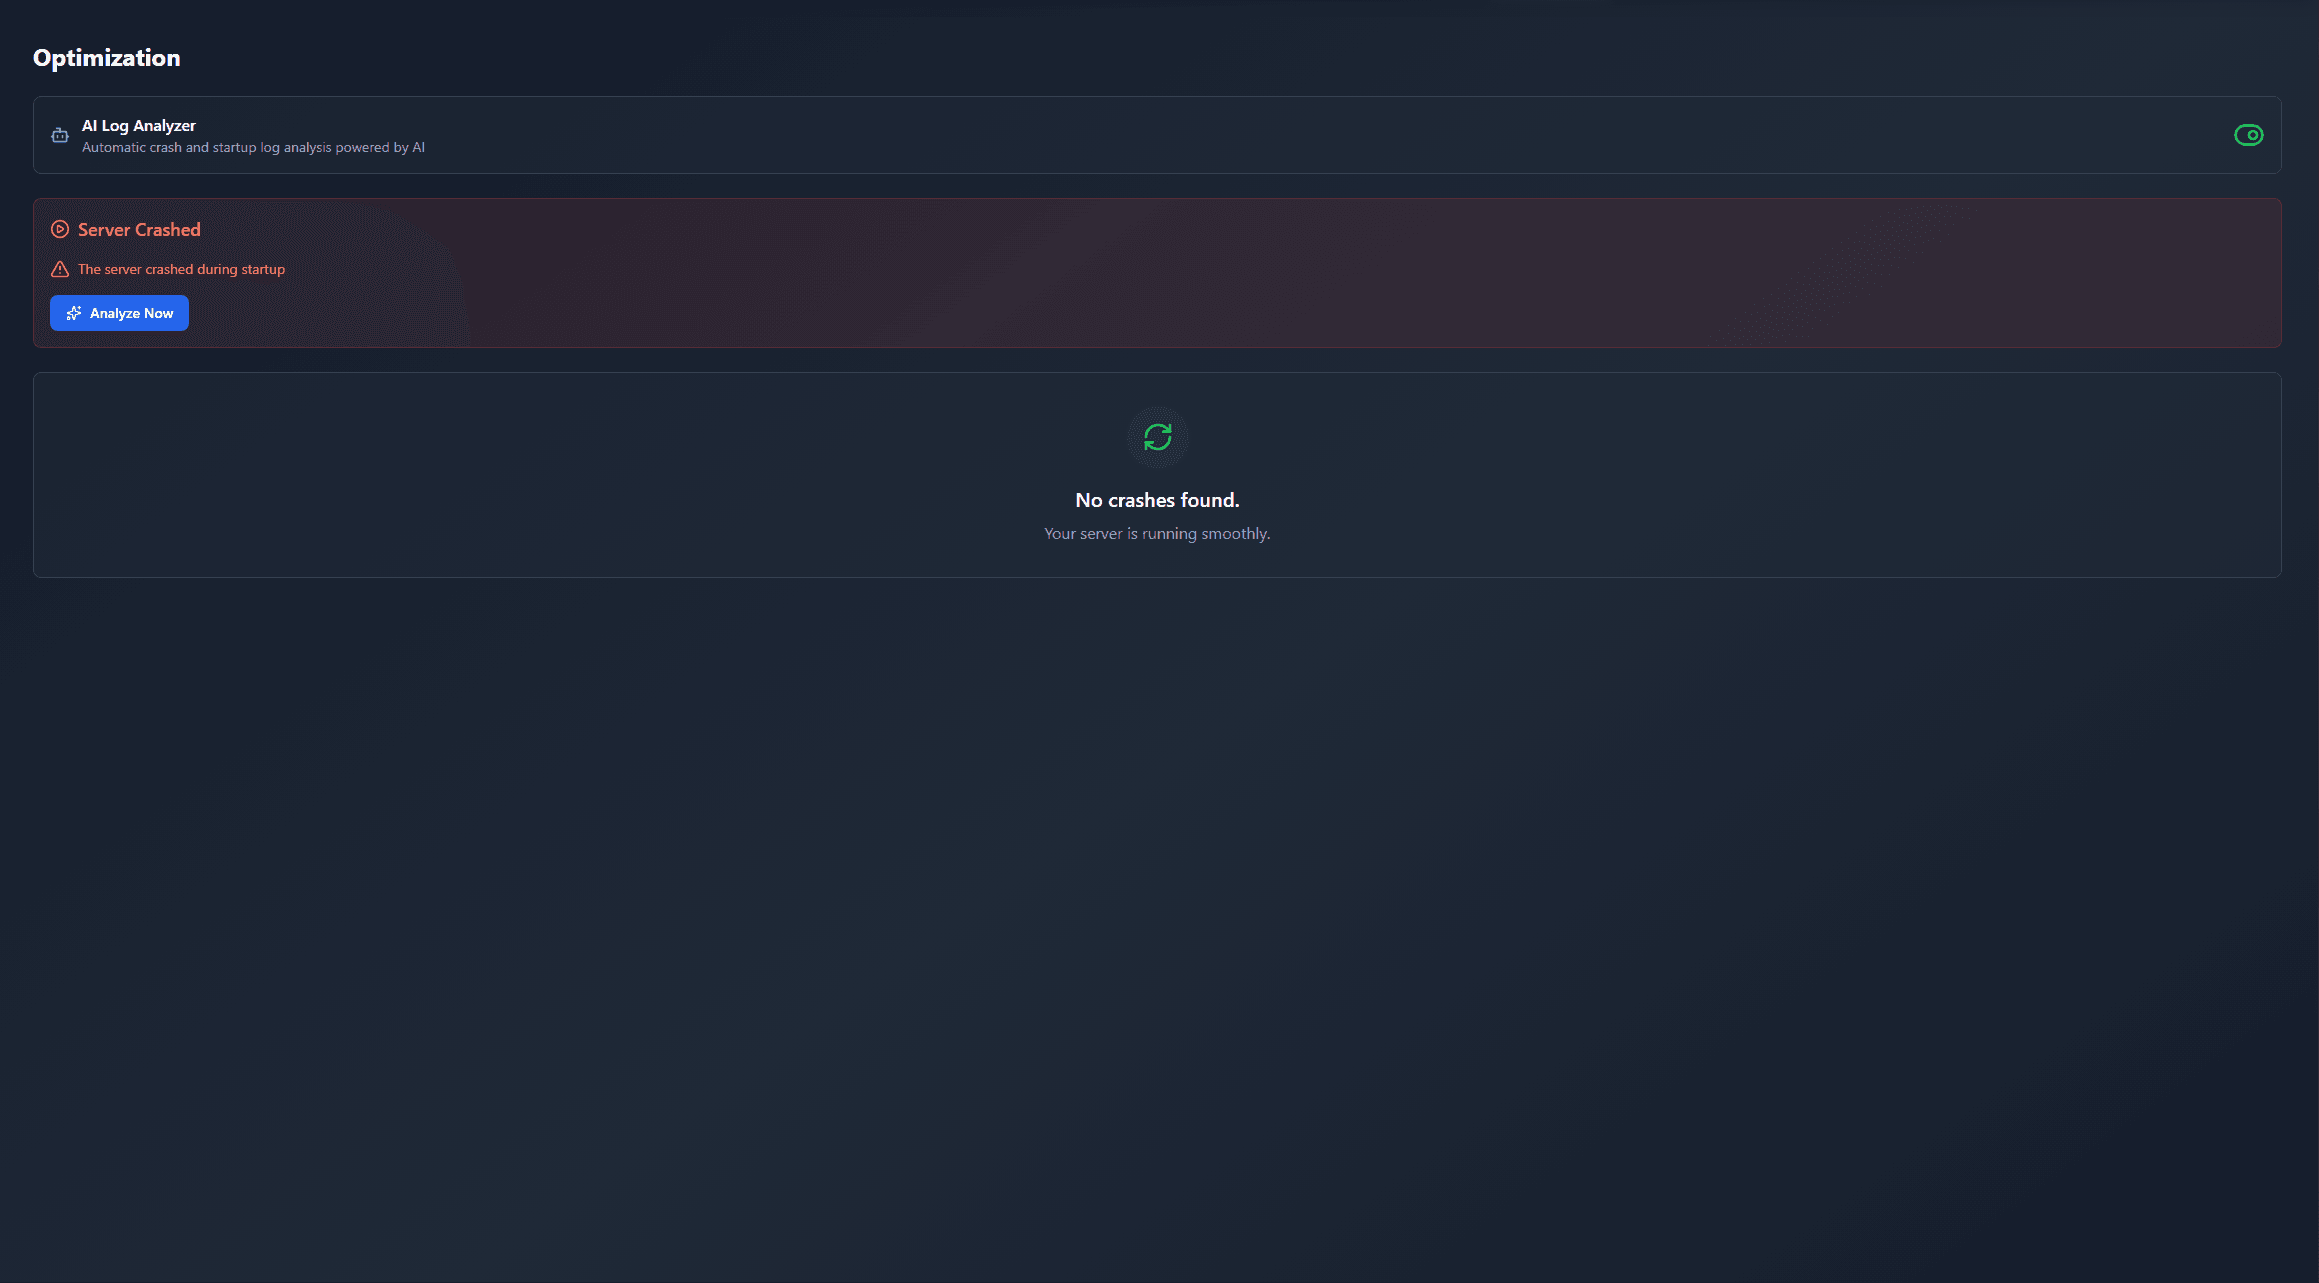
KI-Crash-Analyse
Wenn ein Mod crasht, liest die Analyse das Log.
Mods scheitern oft an einer falschen Loader-Version, Java-Version oder fehlenden Abhängigkeit. Die Analyse nennt eine wahrscheinliche Ursache und einen Lösungsvorschlag.
Versionen
Veröffentlichte Versionen
Nimm die Datei, die zu Loader und Minecraft-Version deines Servers passt. Server und Spieler brauchen dieselbe Version.
Axis World Editor · ModrinthOriginalbeschreibung des Projektautors


⚙️ Core Features
- Axis - is all-in-one vanilla toolset for easy and convenient real-time world editing.

💀 ToLongDieReading - If you prefer Actual text & screenshots
🛠️ Tools and Commands
Tons of Tools and Commands for speeding up your building process
ℹ️ You will find a complete list of tools and commands, as well as their purposes, in the in-game wiki.
🔧Tools
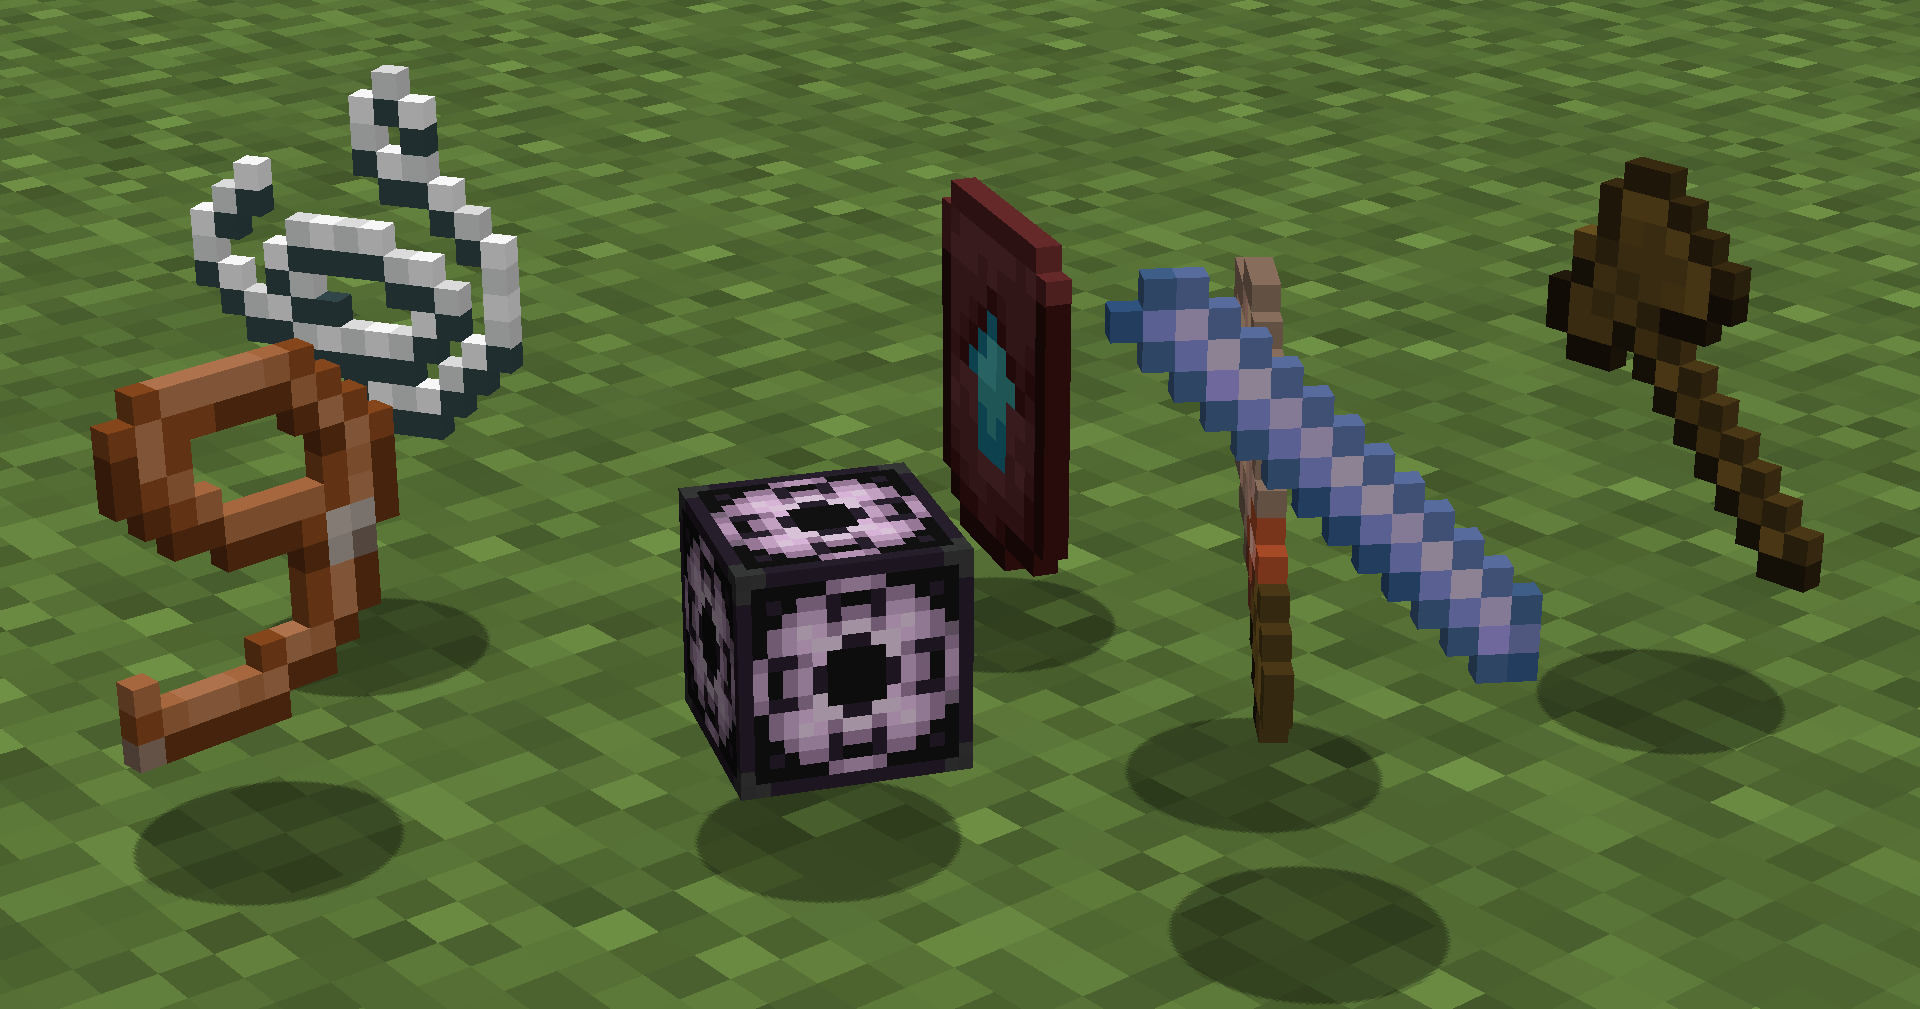
Automatically run functions based on your actions. Each tool has several modes. Throw (default:Q) to change mode, put in offhand (default:F) to change tool.
How to use (X) tool?
Look at the item tooltip, or open the detailed documentation using /function we:help.
| Tool | Modes | Description |
|---|---|---|
| Selector (Axe) | Raycast Mid air 15 Mid air 10 Mid air 5 | Left and Right-mouse clicks to set both region corners. |
| Resize | 1 10 Double Lasso | Left and Right-mouse clicks to resize region in the direction you are facing. |
| String | Raycast Mid air 30 Mid air 20 Mid air 10 | Use it to measure distance by clicking LMB and RMB. |
| Paste brush | Fill-paste (10/20/30/Ray) Replace-paste (10/20/30/Ray) | Right-mouse click to paste (clone) selected region to any other place. |
| Block brush | Diameter 1 Diameter 3 Diameter 5 Diameter 7 | Left-mouse click to pick block, Right-mouse click to paint. |
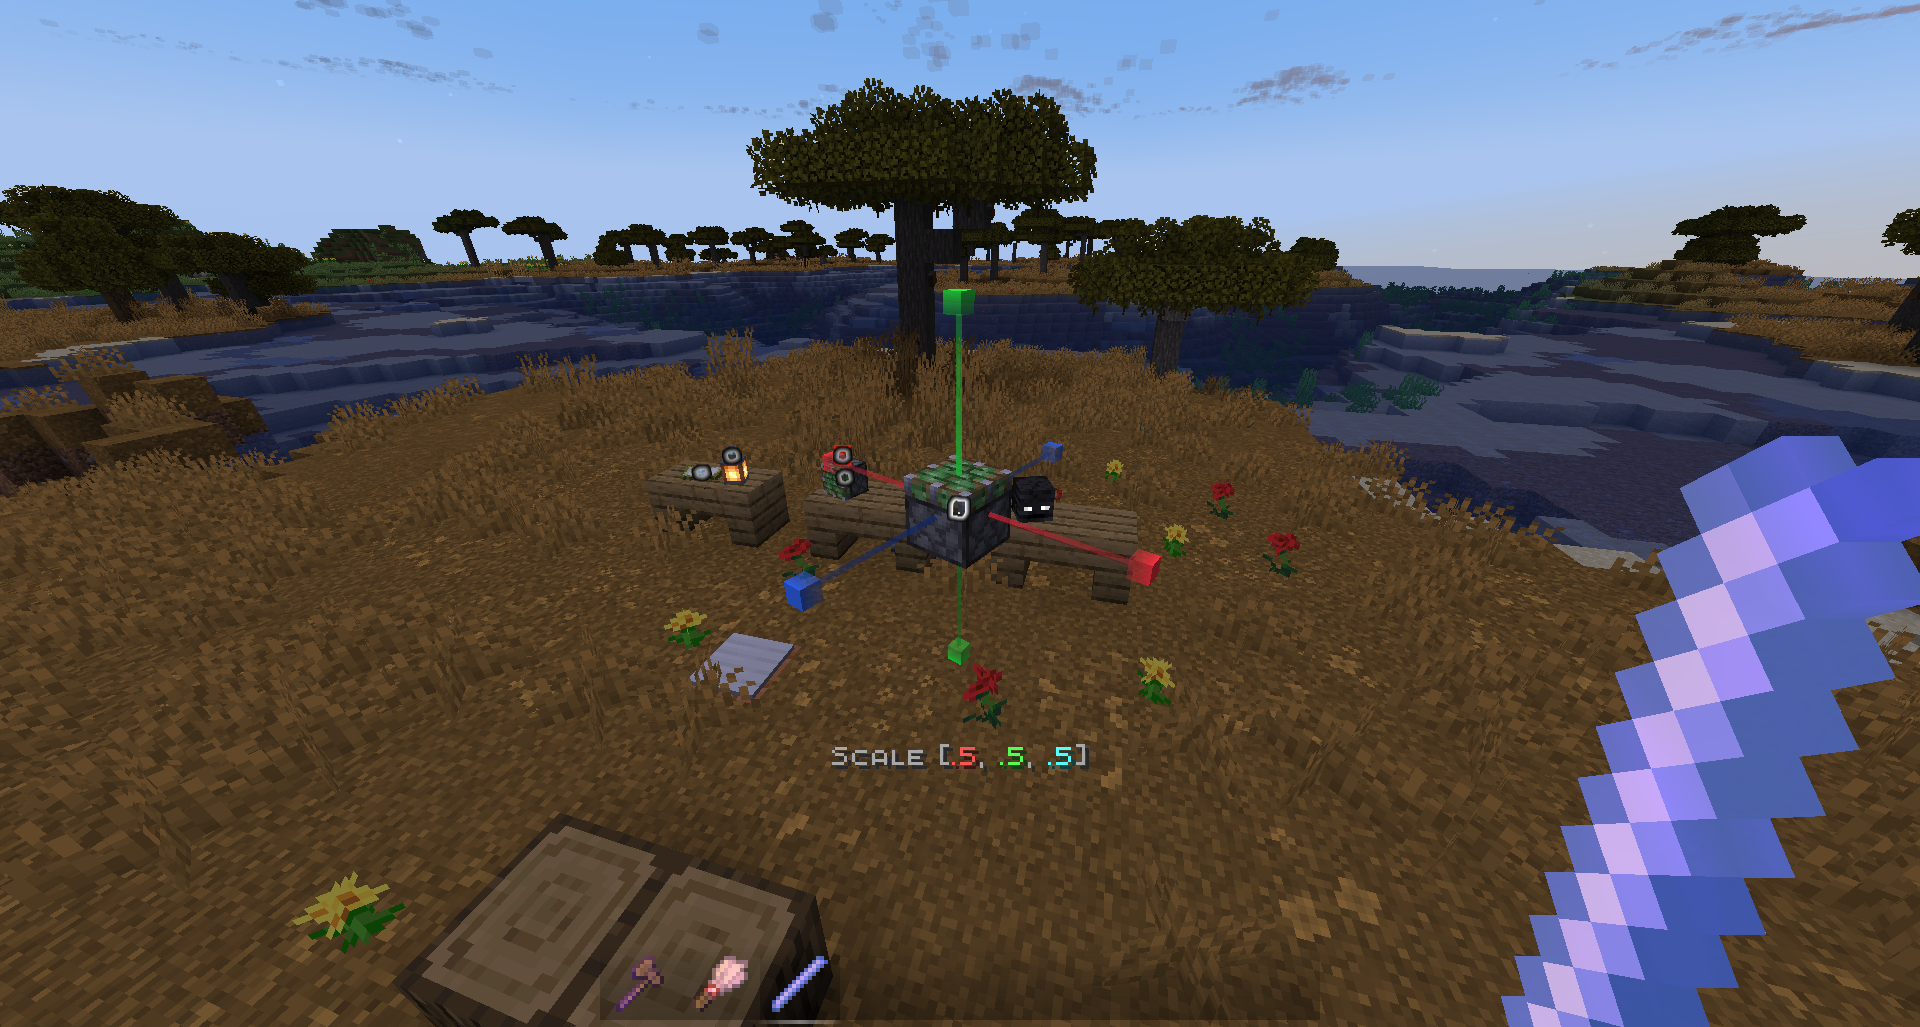
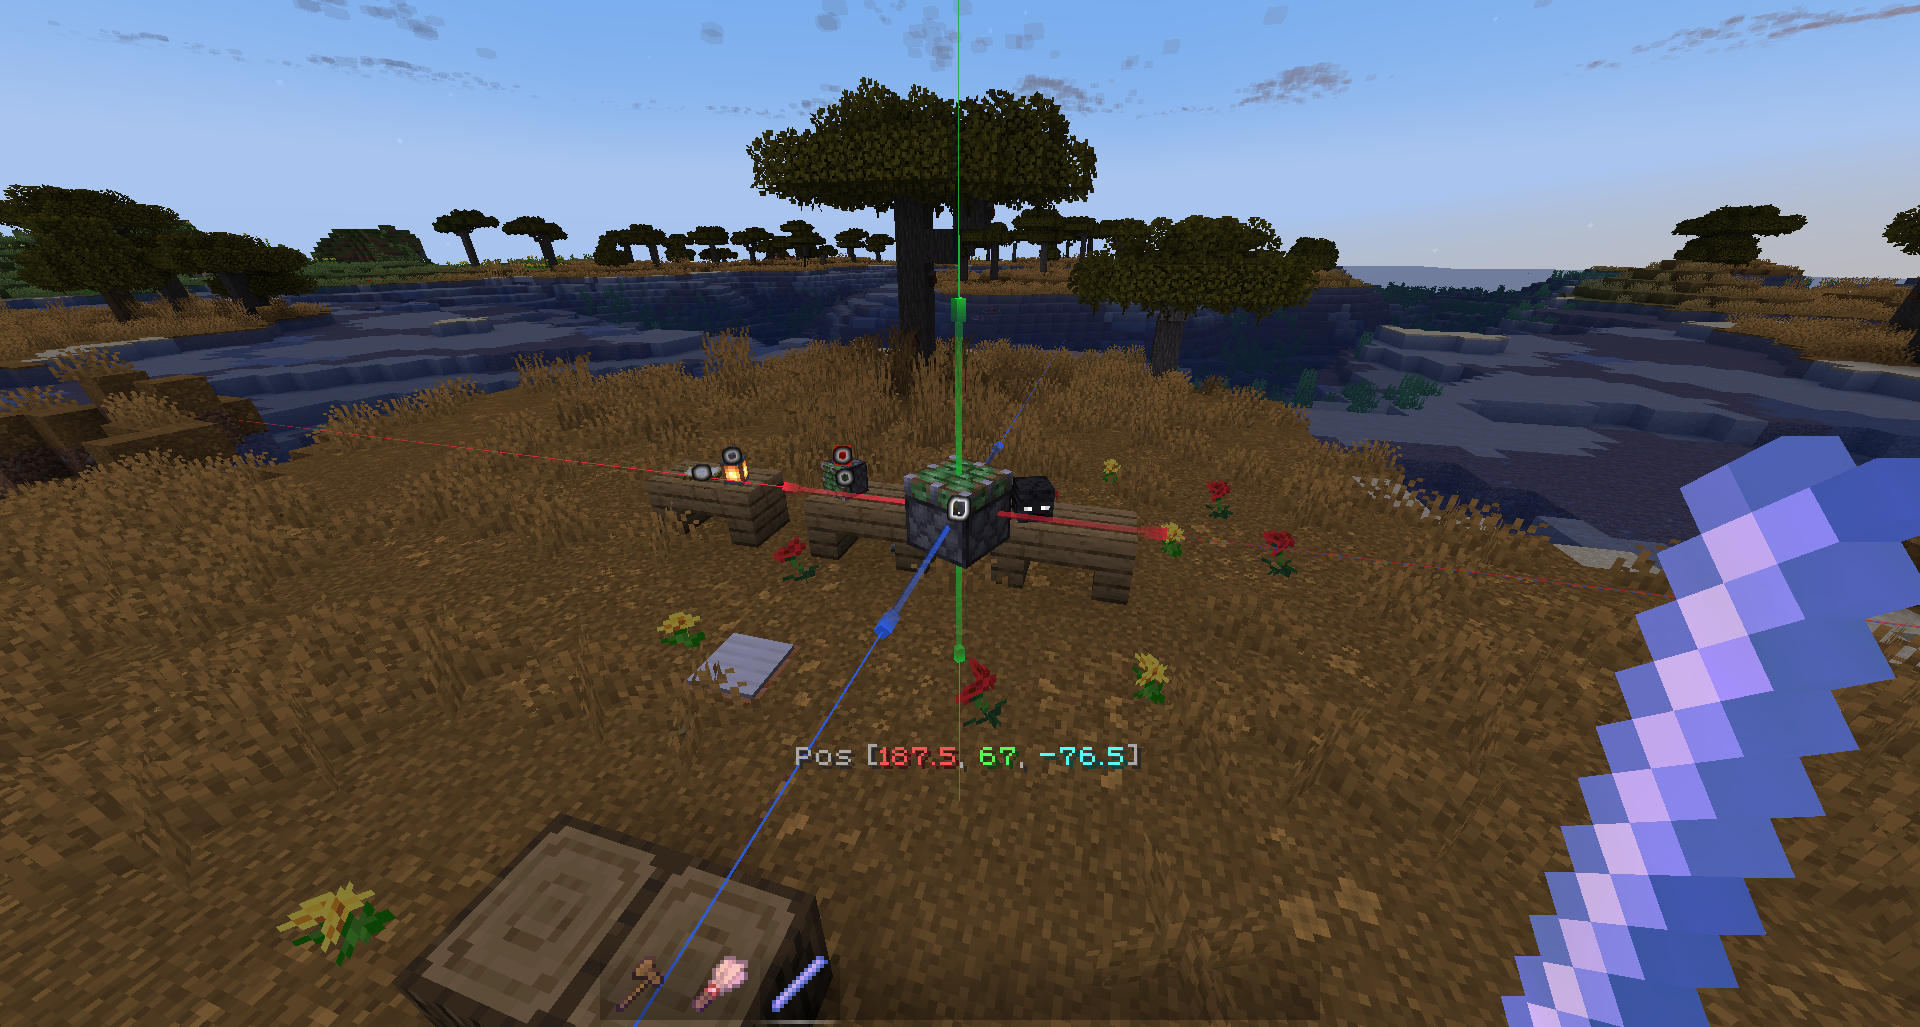
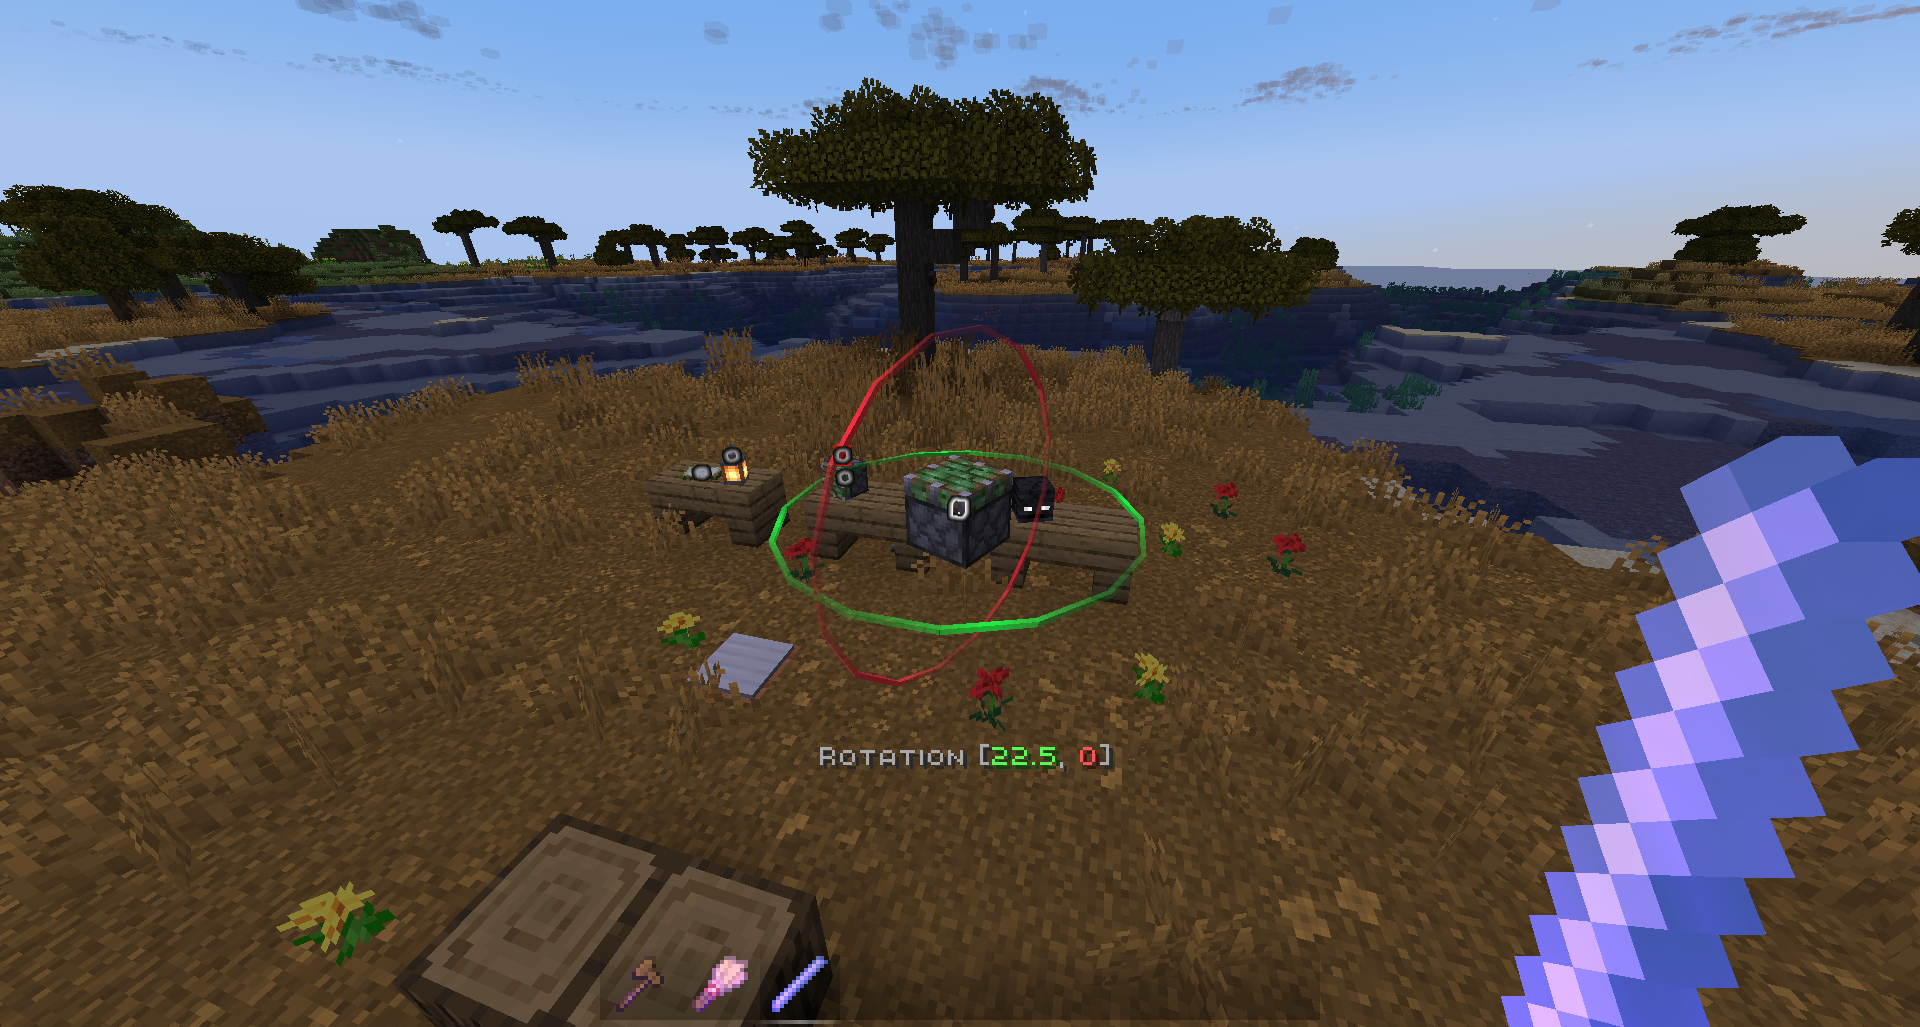
| Display Modification | Scale - 0.5, 0.125, 0.015625 Move - 0.5, 0.125, 0.015625 Rotate - 22.5, 5.625, 1.40625 |
💻 Commands
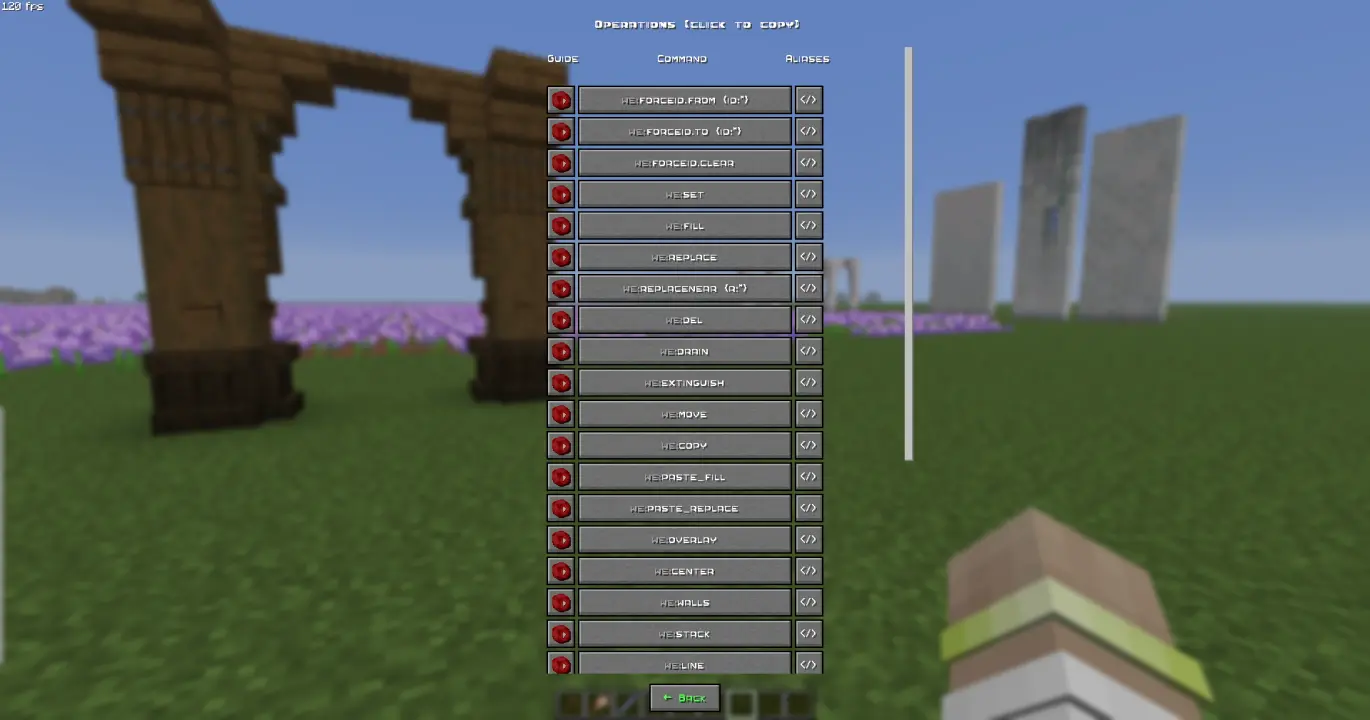
Manual use. /function we:help for more info.
How to use (X) command?
All the user commands are available on the path /function we:. To view each command description, run /function we:help. You need OPerator rights in the world where you want to use the datapack.
Basic
| Command | Aliases | Description |
|---|---|---|
| help | h | Opens help page |
| settings | config | Opens settings page |
| wand | w get | Gives you tool for selecting regions. You can take wooden axe from your creative inventory and it will become wand. Click left mouse button to set the first point of the region, Click right mouse button to set the second point of the region. Both points create a region between them. Read tooltips for more info about using tools and modes. |
| uniwand | Opens UI with all the tools for you to choose | |
| flight | Opens the flight settings menu | |
| pin | Allows you to pin up to 10 custom commands above the Axis chat menu, and use them with a mouse click. Format: /function we:pin {slot:2,cmd:'say Hello World!'} <-- "cmd" without backslash (/) | |
| uninstall | unins | Opens the datapack uninstall menu |
Regions
| Command | Aliases | Description |
|---|---|---|
| 1 | Set the first point of the region. Both points create a region between them | |
| 2 | Set the second point of the region. Both points create a region between them | |
| expand | Expands the region by 1 block in the direction you are facing. You can use resize tool unstead | |
| contract | Expands the region by 1 block in the direction you are facing. You can use resize tool unstead | |
| clear | c | Clears all selected points and regions |
Operations
| Command | Aliases | Description |
|---|---|---|
| forceid.from {id:*} | From = the block that is normally taken from the left hand. Allows you to force the block ID, including the blockstate, when executing all commands that require a block ID. | |
| forceid.to {id:*} | To = the block that is normally taken from the right hand. Allows you to force the block ID, including the blockstate, when executing all commands that require a block ID. | |
| forceid.clear | Clear = removes the Force ID from both storages. Allows you to force the block ID, including the blockstate, when executing all commands that require a block ID. | |
| set | Replaces all blocks in the region with the one you are holding in main hand. If you have no blocks in specified slot, it will be considered as air | |
| fill | Fills all air blocks in the region with the one you are holding in main hand. If you have no blocks in specified slot, it will be considered as air | |
| replace | Replaces all blocks in the region from the one you are holding in off hand with the one you are holding in main hand. if you have no blocks in specified slot, it will be considered as air | |
| replacenear | Replaces all blocks in radius ({r:1} or {r:5}, etc.) around player from the one you are holding in off hand with the one you are holding in main hand. if you have no blocks in specified slot, it will be considered as air | |
| delete | del | Deletes everything in the region |
| drain | Removes liquids from the selected region | |
| extinguish | Removes fire from the selected region | |
| move | Moves the region by 1 block in the direction you are facing | |
| copy | Saves selected area to the buffer. Use together with paste. Copying/Pasting buffer differs from clonebrush, as you can do it between dimensions. The build pastes exactly like it was when you used copy. On the other side, clonebrush clones it from place 1 to place 2 in real time |
|
| paste.fill | Pastes saved area from buffer to the player and blends it with blocks/terrain. Use together with 'copy' | |
| paste.replace | Pastes saved area from buffer to the player and deletes all the blocks/terrain on the way. Use together with 'copy' | |
| overlay | Overlays all blocks in your selection with one you are holding in main hand | |
| center | Finds a center of your region and places 1 to 8 blocks of you are holding in main hand. If you have no blocks in specified slot, it will be considered as glass. If there are already solid blocks in the cetnter of the region, only particles will be displayed | |
| walls | Replaces all outline blocks in the region with the one you are holding in main hand. If you have no blocks in specified slot, it will be considered as air | |
| stack | Stacks the region in the direction you are facing | |
| line | Builds a line of block you are holding in main hand from point 1 to point 2. If you have no blocks in specified slot, it will be considered as glass | |
| rotate | Rotates the region by the specified number of degrees. Affects entities | |
| freerotate | Rotates the region without size or angle restrictions (diagonal rotation is possible). Does not affect entities. | |
| flip | Mirrors the selected area in the direction of view. Affects entities | |
| cut | Copies a region to the clipboard and cuts it out | |
| circle | Draws a circle with the specified radius ({r:1} or {r:5}, etc.) | |
| hcircle | Similar to we:circle, but draws a hollow circle instead of a filled one. |
|
| triggerupdates | upd | Triggers updates of all blocks in the selected region |
| setnoise.perlin | Replaces the selected area with Perlin noise. The noise can consist of two blocks: the one you hold in your left and one you hold in your right hand. If one of your hands is empty, the block will be considered as air. | |
| setbiome | Sets the specified biome to the selected region. | |
| fillbiome | Fills the selected region with the specified biome. | |
| regenerate | regen | Reverts everything within the selection box to its original state based on the world seed. |
History
| Command | Aliases | Description |
|---|---|---|
| undo | Cancels previous action | |
| redo | Redoes previous action (use after Undo) | |
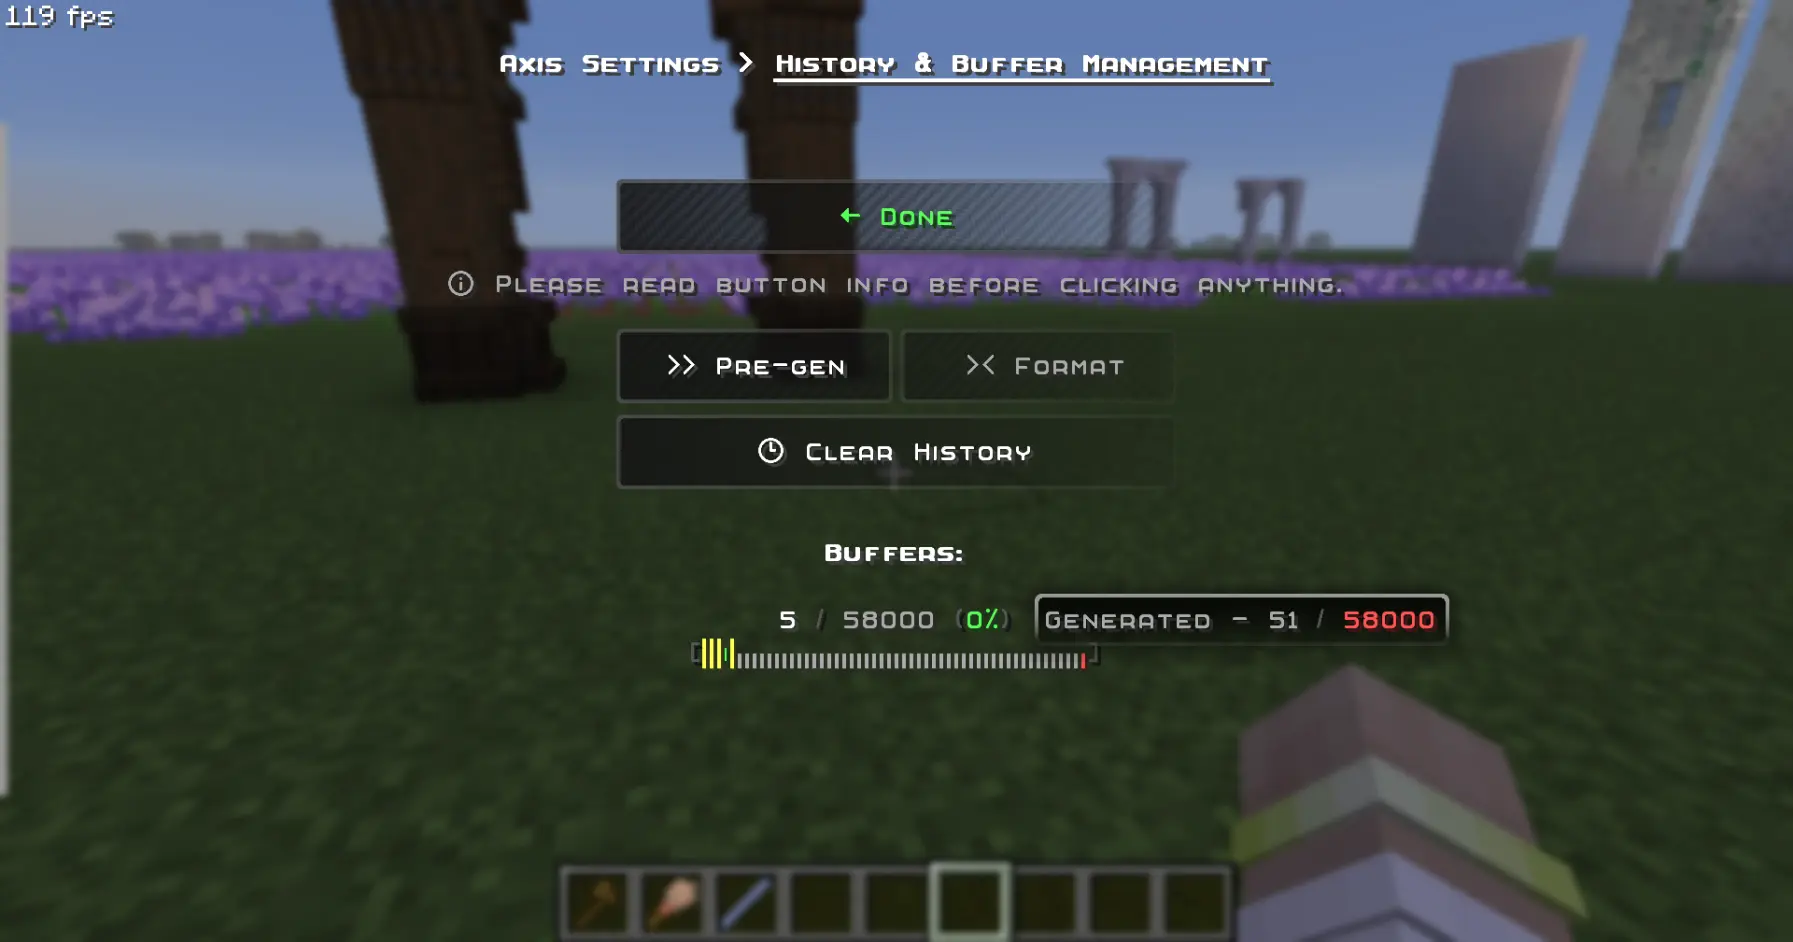
| clearhistory | Deletes all previously saved actions and clears history buffers. Clearing history is recommended when you want to make a 'checkpoint' during building, so you don't accidently undo/redo old actions you don't want to |
Brushes
| Command | Aliases | Description |
|---|---|---|
| b/wand | b/w b/get | Gives you brush tool. You can take regular brush from your creative inventory and it will become brush tool. Left-click to choose block, Right-click to paint. Read tooltips for more info about using tools and modes. |
Displays
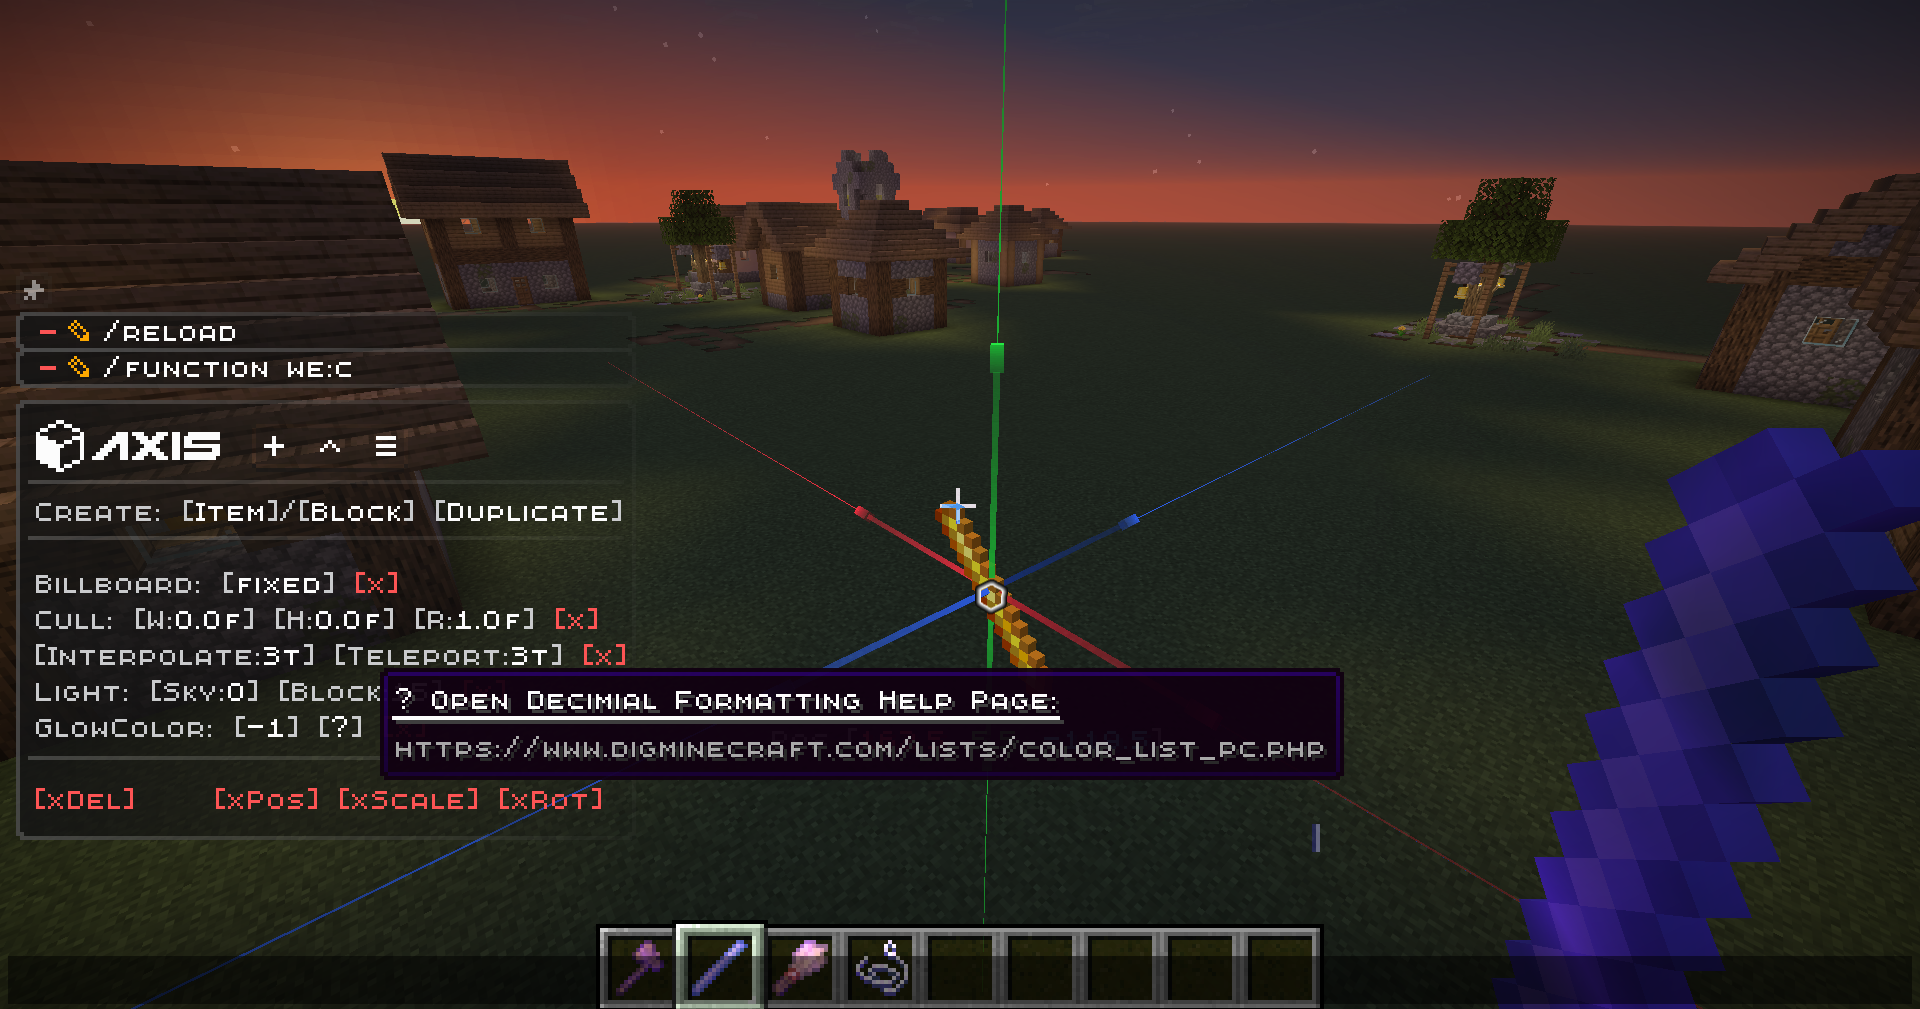
ℹ This is much more convenient to use the quick menu to modify displays than to write these commands manually. To open the menu, take the display modification tool (/function we:d/w) and select the desired display.
| Command | Aliases | Description |
|---|---|---|
| d/wand | d/w | Gives a display modification tool |
| d/create_block_display | Creates a block display entity from the item in your main hand. If the chosen item doesnt have a block state, null display (existing entity with size 0,0 and no visuals) will be summoned | |
| d/create_item_display | Creates an item display entity from the item in your main hand. If the chosen item doesnt have an item state, null display (existing entity with size 0,0 and no visuals) will be summoned | |
| d/duplicate | Creates the exact copy of the selected display entity | |
| d/billboard/center | Display will automatically rotate towards the player on both axes | |
| d/billboard/fixed | Display will NOT automatically rotate towards the player | |
| d/billboard/horizontal | Display will automatically rotate towards the player on X and Z axes | |
| d/billboard/vertical | Display will automatically rotate towards the player on Y axis | |
| d/brightness/block | Sets block brightness (light level) override for display | |
| d/brightness/sky | Sets sky brightness (light level) override for display | |
| d/culling/height | Sets display hitbox height. Setting the culling hitbox allows not to render the display entity if it is outside the border of the screen. For optimization purposes | |
| we:d/culling/width | Sets display hitbox width. Setting the culling hitbox allows not to render the display entity if it is outside the border of the screen. For optimization purposes | |
| we:d/culling/range | Sets the maximum distance from player in proportion to player's entity rendering distance (default=1) at which the entity will be rendered. (Not in blocks! If the player's entity rendering distance = 8 chunks -> the value 1 = 8 chunks, the value 0.5 = 4 chunks, etc.) | |
| d/glow_color | Changes the color of the glow effect outline. Decimial format | |
| d/interpolation_ticks | Sets the amount of ticks needed to interpolate from state1 to state2 in game ticks (State = scale, rotation, etc.) (1 second = 20 game ticks) | |
| d/teleportation_ticks | Sets the amount of ticks needed to interpolate from pos1 to pos2 in game ticks (Pos = xyz position) (1 second = 20 game ticks) | |
| d/reset_brightness | Resets block and sky brightness overrides | |
| d/reset_culling | Resets culling width, height, and view range | |
| d/reset_glow | Resets glow color and removes the glow outline | |
| d/reset_interpolations | Resets interpolation and teleportation duration | |
| d/reset_position | Resets position / snaps entity to the block grid | |
| d/reset_rotation | Resets rotation. (resets only the entity format rotation, not the quaderion format rotation) | |
| d/reset_scale | Resets scale | |
| d/remove | delete | Deletes the selected display entity |
🚀 Smart Forceloading
Smart Forceloading - edit millions of blocks even in unloaded chunks safely.
50+ Million blocks successfully replaced (in one go)
📖 Undo / Redo
Undo / Redo - so you could revert up to 58.000 actions. (in a row)
🪄 Display-Entity Modification
Display-Entity Modification - Create and edit models directly in-game.
🧩 Custom & Modded Support
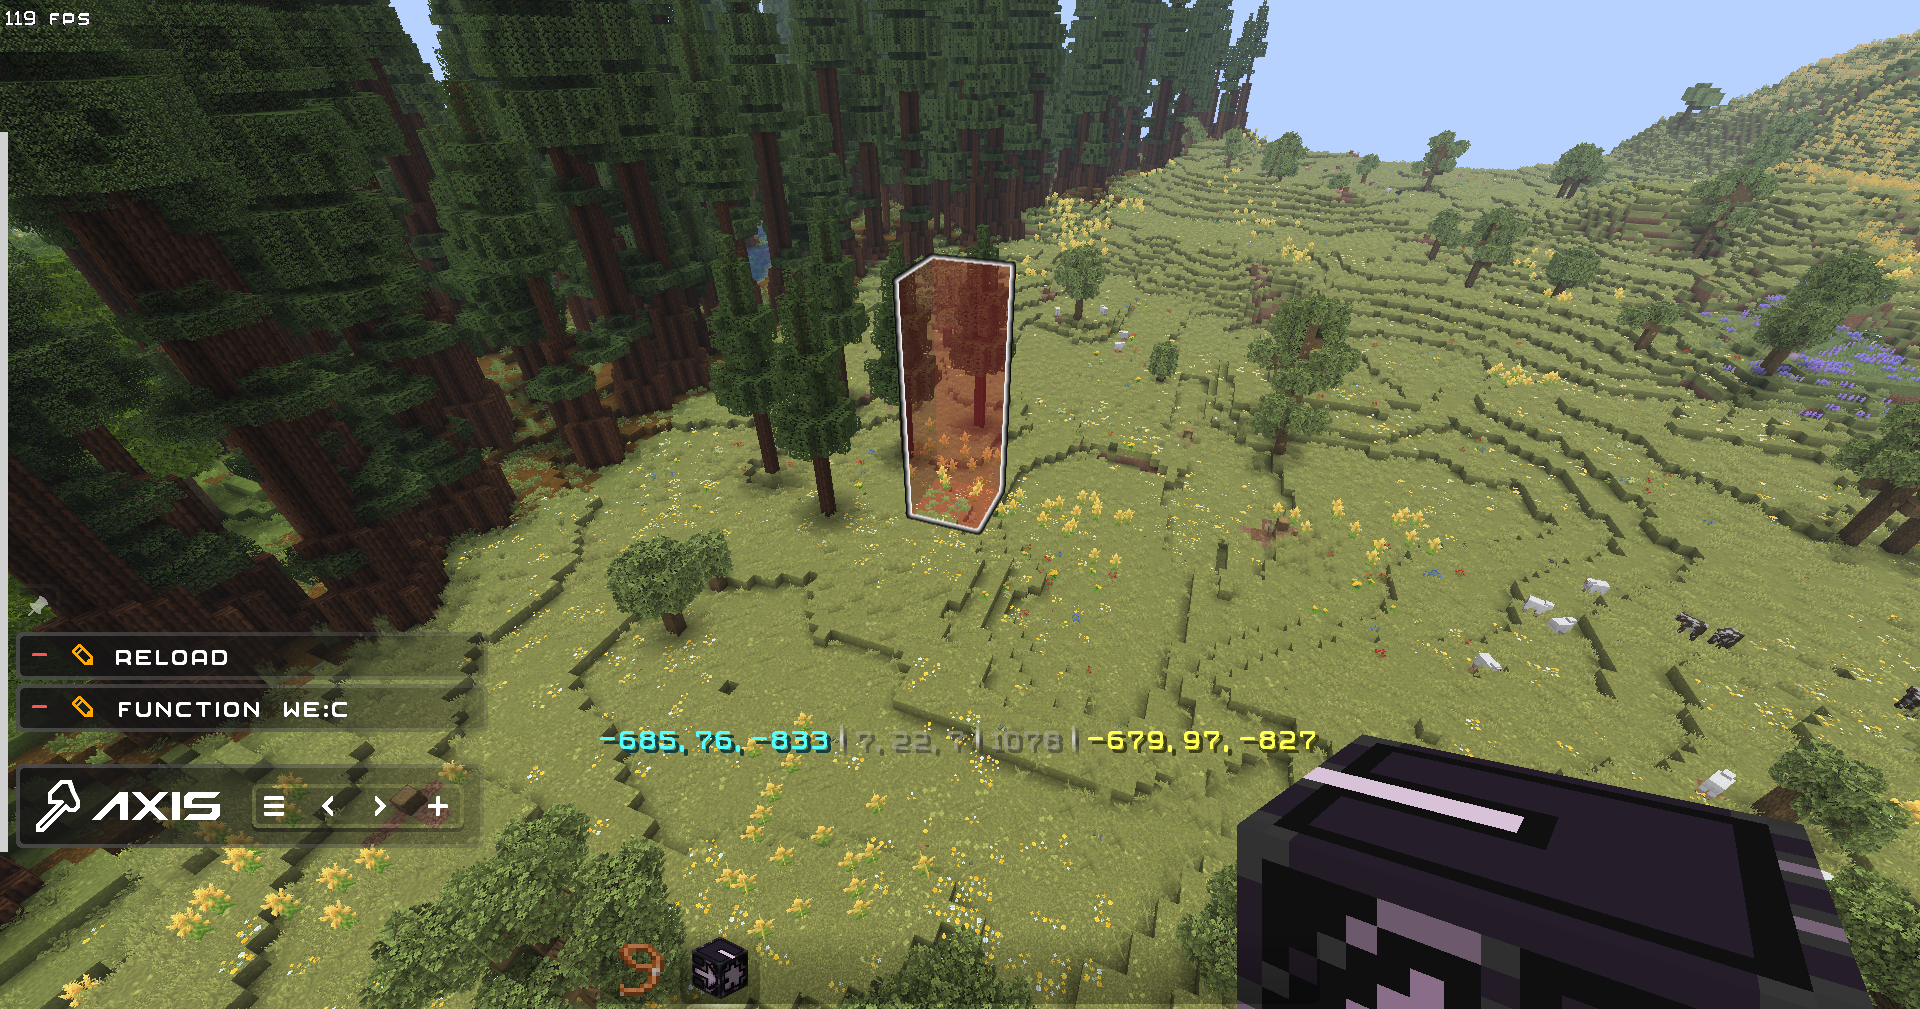
Every command Supports Custom & Modded blocks, biomes, and dimensions.
Pasting trees from Biomes O Plenty mod, consisting of modded blocks, using the PasteBrush tool:
✨ QOL
- Settings to disable all the features you don't like, and Help Menu containing descriptions for every feature and command in the datapack.
- Ghost-Flight and Boost-Flight creative abilities.
- Pinning Commands to the chat for further use in 1 click.
- Fast-Typing via chat-menu - you don't have to write functions every time - just click a button.
- Multi-Hotbar - quickly swap 9 independent hotbars.
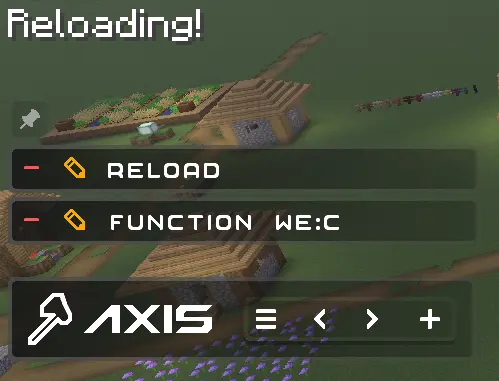
- Hot-Reload - Press key combination for instant /reload: useful for datapackers and mapmakers
🎨 Visuals & Sounds
- Color-Themes - Customize the interface appearance with presets or HEX-code colors.
- Highlighting Markers (entities) with text displays.
- Visual & Sound Feedback for many actions - immerse yourself into the process, or turn off the switches down to the bare bones.
🌐 Localizations
Don't use Google in parallel with building.
- English (en_us) - G4bc (Non-Natvie)
- Deutsch (de_de) - Corrwinn (Native)
- Русский (ru_ru) - G4bc (Native)
- Українська (uk_ua) - G4bc (Machine-Assisted)
- Español Uruguay (es_uy) - G4bc (Machine-Assisted)
- Español España (es_es) - G4bc (Machine-Assisted)
- Português Brasil (pt_br) - G4bc (Machine-Assisted)
- Português Portugal (pt_pt) - G4bc (Machine-Assisted)
- 简体中文 (zh_cn) - G4bc (Machine-Assisted)
- 日本語 (ja_jp) - G4bc (Machine-Assisted)
- More coming soon... join the community if you want to help!
🎯 Principles
Are you still reading? :з
- Forever free - The project will never be sold, and/or have a paywall (paid features), and/or have an extended paid version.
- Forever vanilla - Despite the parallel release of modded versions, the project will always continue to support vanilla (datapack) versions.
- Forever human - NO code or assets, neither in-game, on this site, or any other place assosiated with this project, were generated by AI.
- From builder, for builder - The sole goal is to be as convenient a tool as possible for builders and map-makers. If you have any problems or questions, don't hesitate to ask. Psst, there are also YouTube guides further down!
📚 Guides
📦 Installation
Video
Step-by-Step
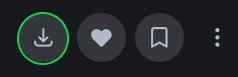
1. Look at the top right corner of the screen and click "Download".
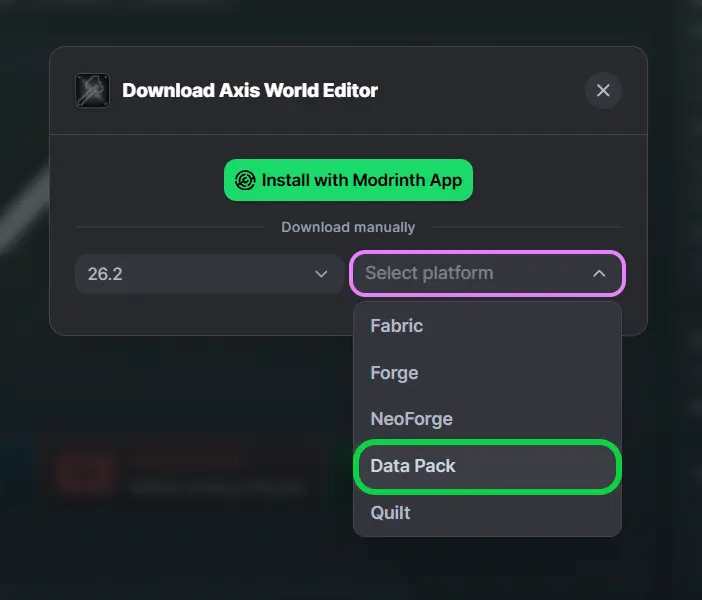
2. Select your game version, and platform "Datapack".
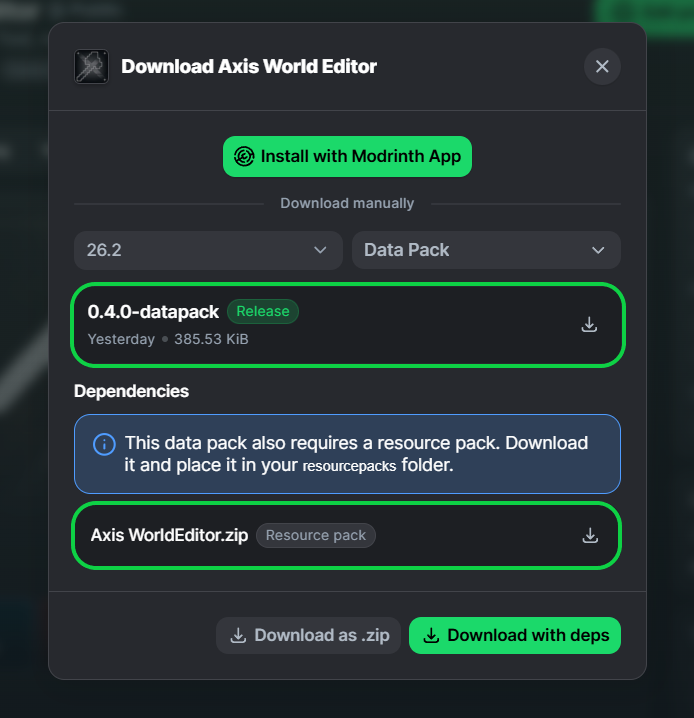
3. You will see two files for downloading: Datapack and Resourcepack - download them.
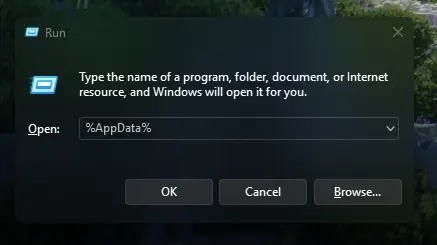
4. Press [Win] + [R] and type %AppData% in the search box and click [OK]
5. Look for the .minecraft folder and open it.
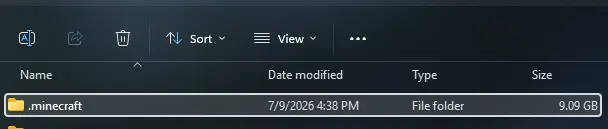
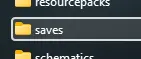
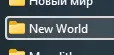
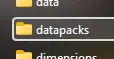
6. Put Datapack in saves\YourWorld\datapacks
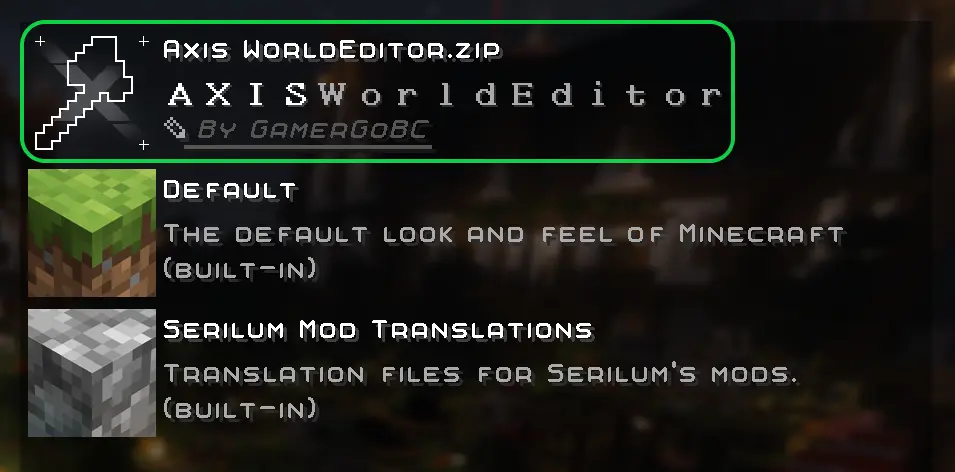
7. Put Resourcepack in resourcepacks and choose it in - game: (ESC>settings>resourcepacks)

8. Rejoin your world or type /reload in chat


Axis World Editor Server crasht beim Start – was tun?
Häufige Ursachen: Loader- oder Minecraft-Version passen nicht zur Mod-Datei, eine Abhängigkeit fehlt oder der RAM reicht nicht. Such im Log (latest.log) nach „OutOfMemoryError“, „Mixin“ oder fehlenden Mods. Bei Mado wertet die KI-Crash-Analyse das Log aus und schlägt eine Ursache vor. Loader und Version änderst du im Panel.
Mit welchem Loader läuft Axis World Editor?
Laut Modrinth unterstützt Axis World Editor Fabric, Forge, NeoForge, Quilt für Minecraft 26.4-snapshot-9, 26.4-snapshot-8, 26.4-snapshot-7. Forge- und Fabric-Dateien sind nicht untereinander austauschbar: Wähl einen Loader für Server und Clients.
Wie viel RAM braucht ein Server mit Axis World Editor?
Als Orientierung 3–4 GB für einen Server mit dieser Mod. Das ist eine Schätzung, keine gemessene Mindestanforderung. Weitere Mods, viele Spieler und große Sichtweiten brauchen mehr. Ob eine Mod die Tick-Zeit belastet, siehst du mit dem spark-Profiler.
Ähnliche Mods
Beliebte Mods aus derselben Kategorie
 Server-fähig
VeinMiner
von Miraculixx
Mine the whole vein on mining a single ore/block. Make the tedious mining experience to something satisfying and fun! FTB Ultimine alternative
 Server-fähig

Geckolib
von Gecko
A 3D animation library for entities, blocks, items, armor, and more!
 Nur Client

VeinMiner Hotkey
von Miraculixx
Veinminer Addon - Use a hotkey to veinmine with a dynamic crosshair & block highlighting
 Server-fähig

Fzzy Config
von fzzyhmstrs
Config API with automatic GUIs, powerful validation options, server-client sync, and more!
Bereit für deinen Server mit Axis World Editor?
4 GB RAM ab 8,00 € im Monat. 35 % auf den 1. Monat mit MADO35.